Contact Us

Use the form on the right to contact us.

You can edit the text in this area, and change where the contact form on the right submits to, by entering edit mode using the modes on the bottom right. 

800 S. Francisco St.
Mission, TX
USA

Our website is all about motorcycles, especially BMW cycles. We cover rides in the Southwest and Mexico, motorcycle modifications and review motorcycle products. 

Big Bend National Pk.jpg

Tips

Tire Wear

Ricardo Perez

Tire Wear Gauge
Always check that tire depth with a trusty gauge. Follow our example, well, not our exact example. Once a tire wears out and hits that first steel band wear comes really fast. As Tomas can attest, this tire wore out on him almost in the same location as his last rear tire, out in West Texas, close to Big Bend National Park, 200 miles from the nearest tire dealer.
Tires at a dealer are very expensive so he drove the bike home and ordered a replacement tire saving almost $200. I wouldn't recommend riding on the steel belt, but there's a real price difference between a dealer replacement tire and ordering one online. Local installation costs $30. Can't beat that!

Restoring My '79 BMW RT

Ricardo Perez

Day 1: I was really struggling to reinstall the exhaust system on my RT. So I stepped back, put some 70's Neil Young on and then the exhaust just fell into place. Next step was the tank. Pour some gas in it and after about four months of being parked, it cranked over a few time and fired right up! That's a boxer airhead for you.


BMW RT Switch Gear Repair... Maybe!

Tomas Perez

Updated 2014/01/19 - 2013/06/13 - 2013/06/04

Warning: This may not work for everyone!

Update: The switch finally totally quit on me (Jan 2014)

I stumbled into something that seems to have fixed both my right hand and left hand switch gear on my 2010 BMW R1200RT.  The bike currently has about 44,000 miles.  The left hand switch has been replaced four times since the bike was new.  Failures include bad cruise control (twice), bad windshield switch, and bad horn switch.  The last time the LH switch was replaced was April 17, 2013.  During a short 220 mile ride on May 27th I noticed that the windshield switch was not working while trying to raise the windshield.  That's the same problem I had with the switch when the bike was less than a year old.  In addition, when I stopped for a water break the bike would not start.  I kept pressing the start button while I cycled the clutch, side stand, and gear shift lever.  Nothing helped but after a number of presses the bike cranked over and started.  This behavior continued for the rest of the ride.  By the time I got home it was very difficult to start the bike.

The Service Manager at the dealer told me to spray some kind of contact cleaner on the starter switch so that I could start the bike and take it to him (265 mile each way).  I decided to use WD 40 Silicone spray mostly because it said it was safe for plastic and rubber parts.  It also provides a waterproof coating on parts.  I sprayed the switch and it would work after about 3 pushes.  Looking good!  I used a very small amount on the windshield switch also but it did not help.

The following day I went for a test ride.  The starter switch worked every time on the first push.  The windshield switch would work after a few tries.  By the end of my 10 mile test ride it was working on the first press almost every time I tried.  On the following day all was still well with the starter switch and the windshield switch continues to get better.  I'm thinking it might need a little more lubricant since I used very little the first time but I will continue to evaluate.  In the mean time the dealer is looking into getting the LH switch replaced under goodwill since the switch failed after only 6 weeks.

2013/06/04 - Update:

 I've gone on a few short rides.  The starter switch is working 100% of the time.  I can move the windshield up by pressing the switch in a very special way.  I don't want to hit it with more lubes because the dealer has agreed to replace the switch again.

2013/06/11 - Update:

The Boerne dealer replaced the LH switch gear on 6/7/2013.  I left the bike at the shop on Thursday and by 8:10AM on Friday the service manager called me telling me that the bike was ready.  All is well with the LH switches now.  I did have to try the starter several times before it made contact and started my bike on Saturday (6/8/2013).  I should mention that the bike sat out in the rain and I did some riding in the rain.  Maybe water is getting into these new switches.  By new I mean the 2010+ RT switch gear.  I plan to continue to use a cleaner/water repellent type of contact spray on the RH switch.  I hit a lot of rain yesterday and the switch worked fine.  My Austin, TX dealer is going to try to get the switch replaced since the bike is only a little over a month out of warranty.  I did confirm that once I start to pay for these switches they have a 2 year replacement policy as long as they are installed by the dealer.

2013/08/25  - Update:

I just wanted to add that the starter switch is still working and I have not done anything to it since the first time.  I'm tempted to give it another shot of silicone but if it's working I'm not going to mess with it.

2013/10/19 - Update:

The starter switch finally gave out three days ago.  Early in the day it was taking anywhere from 5 to 10 presses of the switch to get it to work.  By the time I got home it was taking way more than 10 presses to start the bike.  I did the contact cleaner and silicone spray thing again but it did no good.

Well... since my dealer is 265 miles away I decided to experiment a little.  In any case, I had nothing to loose and I had to find a way to start the bike so that I could ride it to the dealer.  I can make it on one tank of gas if I don't ride too fast.  What I did was to remove the switch from the bar.  There are only two very small screws holding the two halves together.  I think they are Torx 7 or 8.  Once off the bar there is not much more of the switch that you can see except for the wires leading to the switch gang.  In any case, I sprayed the starter switch with a good dose of contact cleaner.  The cleaner must have done it's job too well.  The reason I say that is that once I cleaned the switch I could hardly move it to either the stop or start position.  So then I hit it with a couple of short squirts of the silicon spray.  I let it soak for a few minutes before I tested it prior to reassembly.  To my pleasant surprise the switch worked!  Today was just my second day with the repair but the switch has been working perfectly.  I'll update this post if there is any change but so far so good.

tsp

Still looks new but it failed... again!

"IF THE CAMELS DIE, WE DIE" or Riding In Texas Heat

Ricardo Perez

We're in Del Rio at the WalMart gas pumps. They sit on a small bluff at the west end of town. As we sit on our bikes we fix our gaze west where you can see the city of Del Rio start to run-out into the vastness of West Texas. As we sit on the the RTs I imagine ourselves as Sherif Ali and TE Lawrence in Lawrence of Arabia, as I say, "There is the railway. And that is the desert. From here until we reach the other side, no water but what we carry with us. For the camels no water at all. If the camels die, we die. And in twenty days they will start to die."{from the movie, Lawrence of Arabia}

I thought of the movie because the ride to Alpine from Del Rio is approximately 205 miles, maybe a 20 day hike, and our camels were our RTs that would run out of gas about that point and die. There is gas in Sanderson some 115 miles west, but the possible gas stops in Langtry and Marathon can often be closed so it's always a calculated risk to run west of Del Rio without a full tank. Sanderson has two gas stations, but the nice small one on the east side of town only has diesel and regular 87 octane. We usually stop at the small one because it's got a nice picnic table where you can take a break.

Actually, the ride west was very pleasant; mostly over-cast skies and temperatures dropped to the low 70's as we dodged several thunder storms, weaving through them on Highway 90W by sheer luck. Thunder storm clouds just east of Alpine seemed to reach down and appeared to touch the ground. About eight miles out it started to rain just a bit, but not enough to make us stop. It was just enough to let us know that something was coming. We just beat a good thunder storm into Alpine by about two minutes.

The ride back from Alpine was much more like the movie just quoted. I can only imagine what it was like crossing the NeFud Desert, the 'desert's anvil'. By the time we made Del Rio it was past noon and the temperature quickly shot up to 104 degrees and for the next four and half hours it stayed between 104 and 109. The heat was almost unbearable, the lettering on my Shoei helmet started to slide off it's original place from the heat, and it was impossible to ride with your face shield open unless you wanted a hot blast of air hitting your face. I pictured myself turning into beef jerky, just dried up beef jerky sitting on a bike riding 80mph. I had to ride with the helmet face shield closed so it wasn't long before sweat started to run into my eyes, mixing with the sunscreen that was suppose to be sweat proof, it produced a concoction that caused my eyes to burn so bad I had to ride with my right eye shut for many miles. I wanted to pull over so I kept looking for a tree large enough to give us some nice shade, but there were none along the highway right-of-way. I didn't dare stop in the middle of nowhere thinking that if I did I would probably pass out before I could get my jacket and helmet off. So I endured the one-eyed ride, anyway except for the 18 wheelers from all the oil fracking there was surely no animal out in that heat that would dart onto the highway. I figured the highway surface had to be at least 120 degrees. I kept looking down at the rubber on my foot pegs as they felt awfully soft, thinking they must be melting!

I also kicked myself knowing that I had neatly packed my cold weather riding gear and especially my heated vest, but left behind my camel-back and my perforated riding jacket. I thought to myself that it can still get cold at anytime so why take chances. As we rode along my mind drifted to the debate I always have in my head, is it better to ride in cold 30 degree weather or in hot 100 degree weather. Seems I always side on hot when it's cold and cold when it's hot. "Be warned, you were drifting." {Lawrence of Arabia}

Sitting safely under the shade of the convenience store in Freer, I wanted to give thanks to God for helping us make it through 450 miles of the Nefud desert; call my wife and tell her I love her; and, write letters to my friends at the Bavarian Motor Works (BMW) for putting together a great machine that just hummed along ignoring the furnace road, and another to my buds at Metzler for having made a tire that can take that kind of heat. Rest now, Aqaba is only 150 miles away and it's now down to 100 degrees, soon the triple digits will go with the setting sun. Aqaba!

Locating VIN On BMW R100RT

Ricardo Perez


VIN Tag On Bottom Frame
Matching Engine VIN On Engine by Oil Dipstick


I have a 1979 R100RT and as I understand it's VIN comes a couple of years before they started using the traditional 17 digit numbers. There are several places to find your VIN. The first and easiest place to find the VIN is on the Frame just below the handlebars. On my bike its on the right hand side (as you sit on the bike) and it's stamped into the frame. There can also be a tag on the bottom frame right-hand side. Additionally, on the engine, next to the oil dipstick the VIN is also stamped there. They should be matching numbers, but not necessarily. When you see guys selling there classic bikes, many of them mention that they have matching numbers. They mean that the VIN on the frame matches the VIN on the engine. Thus, you know you're getting the original engine that came with the bike.
Upper Frame Right Hand Side Stamped VIN


There is also a number stamped on a flat plate just above the oil pan on the left side. There are two lines of numbers, but they are not your VIN nor do they have any association with your VIN that I am aware of. I also haven't found out how to trace the meaning of these numbers.


Engine Plate Above Oil Pan Number

BMW R100RT Exhaust Removal

Ricardo Perez


Removed Exhaust From '79 R100 RT
I decided to take the exhaust off my R100RT just to see how it looks and if it needs replacement. I got as a gift the wrench which makes taking off the flange nut off a snap! The exhaust headers have been modified in that the cross pipe that goes behind oil pan had been removed, probably to allow for the Reynolds Ride Off Center Stand. So the ports have been welded shut leaving only the cross pipe that is front of the oil pan in place. I'm not sure how that affects performance, but it doesn't look very neat. I'm wanting to replace those old mufflers that are very heavy with something better, perhaps with some Hoske pipes? Not sure as of yet what I'll do.
The mufflers are a bit rusty especially on the bottom side and could be replaced, but functionally are fine.
I'll update this as I decide how to proceed.


Wrench For Flange Nut

How Wrench Fits Onto Nut

Welded Cross Pipe Opening!

It's an Old Wrench, but great quality!


Tire Wear

Ricardo Perez

BMW R1200RT
What to do when you're at Big Bend National Park and about 250 miles to the closest dealer that carries a 180/55 17 rear tire?  Well, ride slowly. Odessa, Texas north of Fort Stockton is the place that carries this tire. Would you put 250 highway miles on this tire? It ended up making the trip okay, but it would sure worry me. Moral of the story, when it looks worn, it must be worn no matter what the side threads look like! The Z8 Metz served for approximately 14,000 miles and it was replaced with the Battleax at Family Power Sports of Odessa, Texas.
I guess when it gets to that last piece of rubber it starts to go pretty fast!

Spark Plugs and Motorcycles

Tomas Perez

New plug in the middle
Spark plugs have changed so much over the years. When I was young we tried changing spark plugs on US cars about every 10,000 miles. Back in those days it was easy to tell when the car was in need of new spark plugs and it was certainly easy to see worn spark plugs upon inspection. The typical signs that the plugs were bad were hard starting, miss-firing when accelerating, and bad cold weather running. Worn plugs have an increased gap. That makes it much harder for the spark to jump the gap. Increasing the compression only makes the problem worse. This increase of resistance now places additional stain on all the other parts of the ignition system including the rotor, distributor cap, and spark plug wires. Old timers will remember dealing with carbon tracks, cracks in the distributor cap, and glowing spark plug wires in the dark. In this article I'm only talking about spark plugs with an increased gap. I am not considering all the other problems you can have with plugs like broken components, oil soaked, soot, wrong heat range, loose wires, etc.

Well... those days are gone... for the most part. We don't have distributors (no cap or rotor) and many engines don't even have spark plug wires - they just place the coil on top of the spark plug. But the spark plugs are still a main part of our engines. Sometimes I think spark plugs are the forgotten step child of the engine maintenance procedures. People know about changing oil and filters but the spark plugs are left for last or totally forgotten. Many of my car driving friends never change the plugs until something happens. Recently one of my friends said "I just changed the plugs and three coils on the Ford".

I'm one of those guys that "forgot" to change the sparks plugs on my 2010 RT. I have a couple of excuses but that doesn't matter now (although I wonder why they were never changed at my dealer/mechanic provided services). The fact is that I rode my bike for 32,000 miles on the original set of plugs. I guess one advantage of dual plugs on the recent BMW boxer engines is that we can milk the plugs to the very end. The bike ran fine but look at the pictures above and below. You can see the center and side electrodes severely worn. The wire gauge I just used to measure the gap only goes up to 0.040 of an inch and it still had plenty of room left. At least 50% more gap.

Another view
I purchased the OE plugs for my bike. I'm not sure if there is a better spark plug for my bike but I figured BMW did their research and testing that's required with each of their engines. I am very disappointed on the way this spark plug is built... especially for a plug with a retail price of about $24 each. They simply welded on the side electrodes and then bent them over towards the center. That places the inside edge close to the center and most likely at the required gap. This method, in my opinion, presents several problems. First, the edge presents a sharp edge for the spark to jump to - it's the closest point to the center. Second, because it is a fine edge and all the sparks are jumping to that point it soon wears down. As it wears the side electrodes present a wider surface for the spark but by then the required gap is long gone. You can see what I am talking about in the pictures. The center is worn also but the sides are worn much more.
My idea on how they should be built

For $25 I think we should get the configuration shown above. Of course that means our spark plug companies won't sell nearly as many spark plugs as they do now. Look at some of the high end auto spark plugs and you see very well designed electrodes. The edges, if there are any, are not the closest point to the center electrode. The main objective is to be equidistant at all points.
Anyway, back to my bike. It feels like it's running better but it could be a placebo effect since I changed the spark plugs myself and feel like I did a wonderful job. In the future I'm changing the plugs as recommended by BMW or at the least every 20K miles.

Now at 38,000 miles I think I better change the alternator belt. I already have it - just need to do the work.
tsp

My Break-In Procedure: BMW R1200RT

Ricardo Perez

Start With Wine
In Case You Missed the Name
Wine Fact Sheet
Irma and I started my bike's break-in procedure the right way, toasting to the new bike with a surprisingly good bottle of wine, if you see kay . After finishing that bottle I got on to the business of doig the break-in on my new BMW 90th Anniversary Edition R1200RT . We had trailered the bike down from Austin on Saturday; a nice 660 round trip in one day. Sunday afternoon I took the bike out, escorted by my brother on his 2010 RT. We rode 150 miles and followed the break-in procedure recommended by MotoMan; a controversial procedure of hard accelerating to 5500RPMs and then down shifting to either 3rd or 4th and repeating the process. We did this repeatedly the first 25 miles and then more randomly the next 125 miles.   On Monday we rested. Tuesday we took it out for a 210 mile ride repeating the process, but I had increased the RPMs to 6500 after the first 120 miles. That day I also started using the cruise control a little so as to give myself a break.
I must say that I'm very impressed with the bike. It's got plenty of power for me, especially in the upper RPMs and it just hums along at 80mph without any effort. It's a new bike so the mileage at 80mph was running at 39.8 miles per gallon and in the 40s at slower speeds. I think we were right at 4,000rpm while doing 80mph.
Moto Hank's BMW Service in Dilley, TX
Those two days of riding totalled 360 miles then on Wednesday it was off to Dilley, Texas to have Hank of Moto Hank's perform the 600 mile service. We arrived in Dilley with 608 miles on the odometer and only 6 miles of fuel in reserve. We rode from the north side of Edinburg to Dilley, about 210 miles or so, on one tank of gas. The first service is important, but fairly simple, mostly change the crank oil and the final drive oil, check for faults and that's about it. Of course, I had Hank, a certified BMW service tech, sign and stamp my Owner's Manual.
We got back home about 7:30pm with an additional 482 miles for Wednesday. So I have 842 total miles on the bike this first half-week.
While we were at Hank's we met Frank Voellm from Stuttgart, Germany who's taking a few years to ride the world. You can check him on on Face Book and track his travels. He's been in South America and had just crossed over from Mexico on Tuesday after traveling extensively in Mexico. He had his GS bike in for repairs and new rubber before heading out to San Antonio. His plans are to head towards Florida and up the East Coast as weather permitted. He was then shipping his bike to Bangkok as he continues his world tour. He was an interesting guy to chat with and you always meet interesting guys at Hank's.
Just before lunch another rider, Albert from Medina joined us. Albert is 72 and still doing plenty of riding. He shared with us stories about his nice collection of motorcycles. That day he was riding his BMW cruiser for some maintenance work.
On our way up we rode to Freer then northwest to Encinal to catch I35. We can do 80mph on I35, but it's loaded with truck traffic coming and going to Mexico via Laredo. So on the way back on we took Hwy 624 from Cotulla to North of Freer. It's about a 60 mile ride with lots of fracking going on, but we had some entertainment as a pair of fighter jets went over us four times. They were low enough to where the jet engines roared. I don't know if they were just checking out the bikes or on maneuvers, but it was sure neat seeing them fly by. Somehow they didn't seem to have any trouble catching up to us!
Frank's World Touring Bike
Another nice road from Freer to Falfurrias is highway 339 which runs about 60 miles. It's actually free of fracking trucking so it's fast and more comfortable than Hwy 44 from Encinal to Freer. We decided to get on the expressway 281 as we headed back, trying to avoid the back country at night when all things wild come out and play on the blacktop.


The 2010 and 2013 RTs in Falfurrias, Texas


Tomas, Frank, & Albert
Notice Frank from Stuttgart Germany is right at home in 60 degree weather in his short sleeve shirt and sandals!

Here She Is - All Serviced Up Until the 6,000 Mile Mark


View Larger Map

New Bike Break In Procedure

Tomas Perez


There seems to be two schools of thought when it comes to breaking in your new motorcycle engine; 1) ride it gently like the manual instructs you to do and 2) ride it like you stole it.  The standard way is keeping the revs (RPMs) under a predetermined limit for a given number of miles.  Some break in instructions allow for an increase in the RPM limit as the miles traveled pass milestones.  The second method (ride it like you stole it) is pretty much self explanatory.  Ride the bike hard and rev it to redline in the lower gears.

Break in procedures and the associated warnings are in place for a number of reasons.  First and foremost is the fact that all those parts that rub together must hone themselves in thereby creating a very smooth surface.  This process is effectively rubbing (I'm using that term rather loosely) all the peaks and valleys that the mating surfaces have after the manufacturing process.  Even if the assembly process honed every mating surface involved that would not provide any assurance that it would mate up with another part that is probably a different material and typically the opposite shape.  An engine has many examples of this, for example, pistons, cylinders, piston rings, wrist pins, crank shafts, connecting rod bearings, main bearings, and all kinds of cam components.  All these parts are rubbing together and depend on a smooth surface and a thin film of oil to prevent them from self destructing.  Engine technology and metallurgy has changed a lot since the early days but the basic principals of smooth mating surfaces still apply.

I have heard several reasons for the manufacturer's recommended procedures including that they want to make sure that a mistake wasn't made during assembly and the gentle break in will prevent catastrophic damage to the engine.  I believe the reason, apart from basic engine break in, is so that people don't push their machines to the limit for extended periods while all the moving parts are still adjusting to themselves.  In other words use common sense for example warm the engine up before pushing it, no extended redline running, no low speed wide open throttle extended runs, etc.  Each of these has a good mechanical reason for avoiding.  In addition, BMW recommends an oil change in the first 600 miles.  The main reason is metal wear.

There was a time when new or rebuilt engines would require crosshatching the cast iron cylinders in order to help seat the new rings.  Today's engine use much better materials for cylinders, pistons, and rings.  Since this material is so much harder it makes break in a longer process.  Of course the plus side is that once everything is seated in properly you have an engine that can run for many miles with very little wear.  When was the last time you heard someone complain about their engine having piston slap?

When we used to overhaul engine many years ago (cast iron block and the new thing back then was chrome rings) we would take the cars out to the highway and accelerate up to about 75MPH and then close the throttle completely until the car slowed to about 45MPH and accelerate again.  We would do this a number of times in order to seat the rings in.  This is nearly the same process that I use with my new motorcycles.

I push hard up to high speed of about 70 or 80 mph if I can.  If I have no safe way for those speeds I still do the same hard acceleration but in lower gears to much lower speeds.  Then as soon as I reach my target speed I let up on the throttle as much as I can.  For example if there are cars behind me I can't totally drop throttle but I still slow down a lot until the cars approach me again and I repeat the process.  The reason for hard acceleration is that it places a much greater force on all the piston and crank shaft parts.  Accelerating increases piston side thrust pressure and the combustion force increases the pressure on piston rings also.  The deceleration process is just as important.  When you close the throttle at high engine speed you are creating a negative pressure in the combustion area.  This negative pressure wants to suck oil into the combustion chamber.  It wants to suck it past the piston rings and even the valve guides.  This action serves to lubricate and cool those parts.  It's the breather they get after they were pushed hard in the acceleration process.  This procedure is very different from that of holding the throttle open for an extended period of time.  Doing that is never recommended - new or old engine.  That's the reason race car engine need overhauling so frequently especially drag racers.  Also note that I don't approach redline with this procedure - at least not with the RT but I did with my ST1300.

I'm not sure if this can still happen with modern engines but a caution used to be that an engine had a short time to properly start the break in process.  If not followed properly the risk of glazing cylinder walls existed.  Once this happened further break in could not take place.  Someone had to tear the engine apart again rough up the surfaces again and new rings installed.  Worn rings would not seat as fast or as well as new rings.  The rule was don't baby the new engine.  By the way, brake shoes used to glaze over also and that would render them nearly useless for stopping the car.

I'm one of those guys that never had a bike use oil including my current 2010 R1200RT.  Recommended oil changes are 6K miles but I have gone 8K miles between oil changes twice because of extended tours of over 4,000 miles and the engine has never needed oil.  The riding conditions always include high speeds, heavy loads, and lots of climbing - all conditions that increase oil consumption.

A cool 36 F in June

This is the procedure that I use.  I am not saying anybody else should use it.  As much as we pay for these bikes we should be careful with them.  I'm simply sharing what I do and why.

tsp

Switched (and Unswitched) Power Options

Tomas Perez

Power Distribution Box


What do you have to do to provide power to an accessory that you want to add to your motorcycle.  This is what I did on my R1200RT but the same principle applies to nearly any other motorcycle.

Definitions:
Switched - This means that power is supplied whenever the key is turned on.  Power is off when you switch your bike off.  It's nice because you don't have to worry about turning stuff on and off.

Unswitched - Power is always available regardless if the bike is running or not.  The caution here is that whatever you are powering could drain your battery but there are a number of times you may want to use this method.

Let's say you want to add a heated seat to your bike...

There are two ways you can provide a switched power source to your heated seat.  The cheaper (although not as nice or versatile solution) is to power a relay via the marker light wire.  The marker light is the small light at the corners of the headlight.  FYI: the marker light is really a parking light that is required in some countries.  You might be able to use the headlight wire also but I tend to stay away from those because of the CAN bus system.  When you turn on the key the light goes on and at the same time it energizes the relay that turn power on for the seat.  Bike off and the relay drops power and the seat is no longer receiving power power.

A better solution would be to use a power distribution box.  There are several in the market but I use the FuzeBlock.
Link: FuzeBlock

One small box kills about 4 birds with one stone.  This solution allows you have switched and unswitched power available to multiple devices and in addition allows you to fuse each one separately.  I use mine to power additional brake lights, XM radio, GPS, power amplifier, and SAE power plug.  I also have a direct connected (fused) SAE to the battery for heavy duty stuff.

Once you have installed a power distribution panel to your bike it makes it easy to add powered options.  In addition, you have the option of using switched or unswitched power.  You can even have double switched power to a device.  For example, let's say you want to add a driving light that only turns on with your high beam.  These types of lights normally come with a switching relay that is controlled by the high beam wire and directly connected to your battery but  I would still use the power distribution box to supply power to the switching relay.  This is a case where you could use either switched or unswitched power to the relay since the relay is only switched (powered) whenever the high beams are turned on.

When shopping for a power panel be sure to look into the number of circuits supported, maximum current per circuit, and total current supported by the panel.  Also are the circuits switched or unswitched.  You might be able to live without unswitched circuits but at times that can be very handy, i.e., map lights, cell phone chargers, camp lighting, etc.

tsp
FuzeBlock

Fuel Additives and Other Snake Oils

Tomas Perez

Back when I was young and I was purchasing cars for $15 we would at times have to buy a thick... very thick... oil additive for old, tired engines.  It was not a fuel additive but more of an oil additive.  The additive's main function was to stop oil burning.  I guess it made the oil so thick that it had no way to work it's way up past the piston rings.  That thick stuff on the piston skirts also quieted the piston slap on my 1947 Nash.  And since it seals around the compression rings so well I was also expecting a power increase.  All these benefits in a small bottle.  It was no wonder that I wanted to buy a bottle at every oil change.  Warning - do not follow the advise listed above.  I was 15 years old and I thought I knew a lot about cars.

Put fuel additives into this oddly shaped thing


Fast forward to the present and I now have a 2010 R1200RT that cost me a bit more than the $15 that I paid for that first car.  I need to insert a disclaimer at this point.  I needed to buy a used tire and used battery plus a head gasket for the Nash before it was ready for the road.  The engine on this bike is a modern mechanical and electronic marvel.  Where the Nash had a single throat downdraft carburetor the motorcycle has electronic fuel injection.  But in spite of these advancements I've had two BMW service advisors recommend that I use a fuel additive on my RT.  They said it helps to counteract the ill effects of the not so great fuel that is currently available.  They also told me that it will help save my fuel strip.  I stated that I always buy the best fuel that I can find but that I can't always control that when I am touring.

I questioned his advise.  After all, the product that a lot of people recommend and that I have used in BMW cars in the past cost more that the used tire and battery ($6 for both) that I needed for my first car.  But I'm not cheap when it comes to taking care of my bikes and cars.  Maybe I should use a fuel additive whenever I have a chance.  And mind you, I can only use these products when I am at home and using the bike for daily errands.  There is no way I plan to carry and use these products while on tour with other riders.  Most stops are quick for the 600 to 800 miles a day crowd.  But then something happened to convince me to use these products whenever I have a chance.  In the last few months we've had some major storms in our area.  During one of these storms I think I got water in the gas tank of my Miata.  At least that is way the car acted.  It would stall at every stop light and the engine ran very rough.  Not wanting to drain the entire system I purchased a can of Sea Foam and poured it into the tank.  I had zero problems with the car after that.  I went from stalling at every stop to ZERO stalls.

I was so convinced that I immediately went out and purchased Techron Concentrate Plus for my other cars.  By coincidence the auto parts stores were running a buy one - get one free sale on Techron.  I put some in all my cars and a much smaller portion in the tank of my RT (you don't have to remove the tank to add the fuel additive - see picture above).  This stuff is sold in 12 oz (treats up to 12 gallons) and 20 oz (treats up to 20 gallons) sizes.  In addition, make sure you buy the "concentrate plus".

This is what I'm using.

While taking the photos for this review I happen to notice this statement on the cardboard tag.  Was this written for us RT riders?  Of course I'm kidding but there must be some cars out there with failing fuel sensors.

RT friendly?

I like to rate products that I review but I have no proof that this product works.  I'm sure it can't hurt car or bike engines.  As a matter of fact some gasoline has this stuff in it already.  With that condition in mind the only negative is the cost plus the time in buying it and using it.  My cost was $7.99 and $12.99 for the 12 oz and 20 oz respectively and I got two for the price of one.  And although I can't rate this product my Miata will give the Sea Foam a 10.  I've already gone through two tanks of gas and still no problems.  I used the Sea Foam for removing water from the tank and prefer the Techron for keeping the system clean.

tsp


Motorcycle Riding in the Rain

Ricardo Perez

My Harley After 600 Mile Ride
This weekend we rode to Boerne, Texas for some service work on a couple of 2010 BMW RTs at the Alamo BMW Motorcycle dealer. It's about a 300 mile ride each way and on our way up we rode most of the way through fog, mist, and/or rain with temperatures in the high 50s and low 60s . We actually left Friday morning about 5am so the first hour and half was before sunrise, but once daylight arrived it still looked fairly gloomy with low hanging clouds and fog and rain. Our ride was fairly uneventful except for the time I got a chuck of Javelina meat on my helmet. It was fresh road kill which a car in front of me kicked up while we were doing about 70mph. The driver in front of us ran right over it and we were able to maneuver in-between carcass parts. I cleaned my helmet at the next gas stop.
Since two of the guys had service appointments we rode up taking the fast route up Highway 281/37/&10.  I used a two piece Tour Master rain gear which is about eight years old and discovered on our arrival in Boerne that the pant's inner lining was beginning to flake off so I was wet from my knees to my ankles, not a good thing in cool weather. I ended up buying new rain gear from BMW and I'll report on that in another posting.
Coming back down to the Rio Grande Valley we had more time and chose to travel via Highway 16, running from San Antonio through Jourdanton, Freer, Hebbronville and San Isidro. Traffic on this once peaceful route is now congested with oil rigs working on the new oil fracking business. As we pulled into Jourdanton's only gas stop and convenience store we entered a crazy hectic scene of trucks and pickups of mostly roughnecks and a few hunters. Those Fracking boys have literally swarmed all over South and Southwest Texas and taken hold of every gas stop, motel, and restaurant. The parking lot in Jourdanton's gas station was filled with mud from both the vehicles and the worker's boots. A temporary boot cleaning station was setup in front of the store's entrance to minimize the amount of mud workers tracked inside. The scene was surreal and our fellow rider Marcos Gutierrez said, this is how it must have looked like during the Gold Rush Days. What a fitting analogy. This fracking business is really keeping our Texas economy going, but it sure lessens some of the beauty of our rides. Now its not uncommon to see endless lines of trucks, pipelines hugging the highways and oil rig patches where once was bluebonnets. And that's not to mention the amount of debris on the road ranging from simple trash to oil pipelines, that makes for a risky ride. The price of progress!
As you can see from the photo, it's not too smart to get too close to one of those big rigs. Most of those rigs are coming onto the highway from dirt roads so their tires are loaded with mud and even if you give them a wide berth as you're passing them you'll get some mud. My bike ended up about as dirty as its ever been.
In San Isidro we saw a guy win $10,000 on a scratch-off card! Marco promptly bought a scratch-off card and asked the winner to touch his card. No Luck! I also had the misfortune of hitting a Road-Runner as it flew in front me. I was doing 78mph when it collided with me. The feathers in the above picture show them as they were stuck to the head light trim. It was a big bird and I was surprised to see it flying instead of running as they usually do. So on this short ride I had Javelina and Road-Runner either on me or the bike.
On the return ride it only rained for about 50 miles or less and my new rain gear worked perfectly. The clouds and rain were blown away by a stiff northern that reportedly had gusts up to 56mph at times. The wind was hitting us diagonally between our backs and right side as we headed South.
Here's my tips on riding in the rain:
1. If it's a heavy rain use your rain gear's head hood if you've got one. It'll keep rain from running down your helmet and onto your back.
2. Close your helmet vents.
3. Wear gloves that allow you to wipe your face shield like the BMW Motorrad All Season gloves that are water proof and also have a handy squeegee on the left hand's forefinger. It's a life saver.
4. Spray your inside face shield with some type of anti-fog agent if it's wet and cold or use the double layer shield that's made to avoid face shield fogging.
5. Take enough time to make sure your rain jacket is zipped up all the way, collar is fully closed as well as sleeve openings.
6. Close rain pants well at waist and especially on the lower leg openings.
7. Wear water proof boots. I normally use Red Wings, but when it's raining I'll use my Sidi Boots that always keep out moisture. Nothing worse than riding with wet feet.
8. Take time to check your mobility ranges. If it's cold and your layered up with shirts and jackets underneath your rain gear you may have trouble moving and turning your head as you normally do so check out how much limitations you have with everything on.
9. Careful on the road. Trust your tires if they're in good condition. A tire in the rain will still have about 80% of its normal grip so don't be afraid to lean into your turns just don't overdo it. I've seen guys taking curves in the rain and drifting into the other lane because they're trying to stay upright instead of taking the turn with a normal lean angle.
10. Watch that middle of the lane section. It can be the last part of the highway to get oil and mud completely washed off so I usually avoid that part of the lane and stick to the well marked auto tire trails.
11. Watch those big rigs when you're passing them. They can really shower you with dirty rain water, sometimes in an instant and making your vision almost zero. I'll usually speed up when passing a big rig just to be safe.
12. Keep yourself well spaced between vehicles and other fellow riders so you've increased your margin of error.
13. Try to minimize the amount of time you ride in the rain after sunset.
14. Enjoy the ride, don't let a little rain spoil your plans. We only stop if its raining so hard that you can't see, but then everyone is usually pulling over.


View Larger Map

Motorcycle Touring in Mexico: The Basics

Ricardo Perez

Highway & Lupe from Corpus Christi, Texas

We haven't travelled into Mexico on motorcycles since 2008 due to the rash of violence especially along our border towns, but for those that venture into Mexico here's a report on the basics for travel in Mexico. It may be dated and things always change so make sure to find out what's new and what may be different.
You'll need permits for yourself and your ride if you plan to go beyond the 22 kilometer mark. A kilometer is .62 of one mile so just multiple 20 X 6 = 120 or 12 miles. This formula will come in handy throughout your trip. It's best to get your permits at least a day or two before your ride if time permits, if pressed for time you can get them as you enter Mexico at the Port of Entry.  Getting those requires pesos. The best place to get your dollars converted to pesos is at any of numerous “Casa de Cambio” (Exchange House) businesses located at all US border towns.  Some banks also exchange dollars for pesos and usually at a better rate since they provide it as a service to their customers. In 2008 the exchange rate was approximately 10 pesos to one dollar. I usually carry about $100 US dollars per day or a thousand pesos.

Here are my typical day’s expenses (in US Dollars):

     Gas:            $25
     Tolls:            25
     Snacks:         20
     Meals:           25
     Hotel:            75
     Beer:             25
     Souvenirs:        5

     Total:         $200.    

That’s about $2,000 pesos in one day or well beyond my $1,000 budget. So I usually cut back on one or more of the above. A good hotel can be $90 or more per day and a small non-name brand hotel in a small town is usually $30 to $40 per day. I don’t buy many souvenirs and I usually don’t eat three full meals a day, but do enjoy a great dinner with refreshments before. If the bigger cities are your destination then you can limit the amount of cash you carry if you charge your room on a credit card. Always carry small bills in a pouch or a pocket you can reach into with your gloves on to pay for tolls. Tolls usually run between 19 to 30 pesos and you don’t want to have to turn your bike off and start striping clothes off just to reach for a toll. So have it ready and within reach. If you don’t have small bills you’ll be getting lots of change and that will pose a problem if you don’t have a ready place to stash it without having to stop.

You need two permits. The Tourista Permit which is your personal traveling permit and one for your bike, unless your significant other is riding along with you then they'll need a permit as well.

To get these permits you need to cross into Mexico with the bike. It’s best to do it on a weekday afternoon when it’s not so crowded. You’ll have to pay anywhere from one to two US dollars to cross from the US side to Mexico. Have your toll ready. Friday afternoons are too busy and you risk running into long lines and the weekends are not good. I usually cross over at Nuevo Progresso which is a less crowded international crossing and it gets me in and out usually within 30 minutes. As you cross on your bike the Permit Offices are typically just before the Mexican Customs, where all the traffic is usually going – into Mexico. There are signs in Spanish and English instructing you where to go to get your permits. In some international crossings if you go beyond the inspection point on the Mexican side where the custom officers are located you may have to turn around, pay a toll at the Mexican side and make another turn back towards Mexico to get to the Permit Office. Trust me, you don't want to have to do this especially if you're riding two-up in heavy traffic.

When you get to the place you're looking for, it's usually called the Tourista Permit Office. There you will be given a Tourista Permit Form or depending on how good the officer is feeling she may fill out the form for you. You need to declare where you are going and how long you’ll be in Mexico. You can get a seven day permit for no fee or one valid for 180 days for approximately $20.  You need some form of identification such as a wallet size birth certificate, drivers license, or passport. Passport works best, followed by a birth certificate and then a valid drivers license. You will be asked to sign the visa then you will be directed to a cashiers booth or local bank where you need to take the visa and pay for it. That’s why going during non-banking hours complicates things. You can actually pay for it on your trip at any local bank, but if you’re like me you will forget and when you surrender the visa you’ll be fined approximately ten dollars plus the original cost. So don’t procrastinate and get it done.

The second permit is for your bike. This is a little more elaborate procedure. The most important thing to remember is that you must pay for it using either a MasterCard or Visa credit card. Its Mexico’s way of having your credit information in hopes of preventing people from taking their vehicles into Mexico and selling them. Theoretically, the idea is that they can take the value of your vehicle off your card if you fail to return your permit. Don’t test it. You will also need some pesos on you. You will be asked to go to a clerk to make a copy of your vehicle registration document and pay cash for the service, less than a dollar. Return to the vehicle permit office and submit your vehicle documents, identification, and 
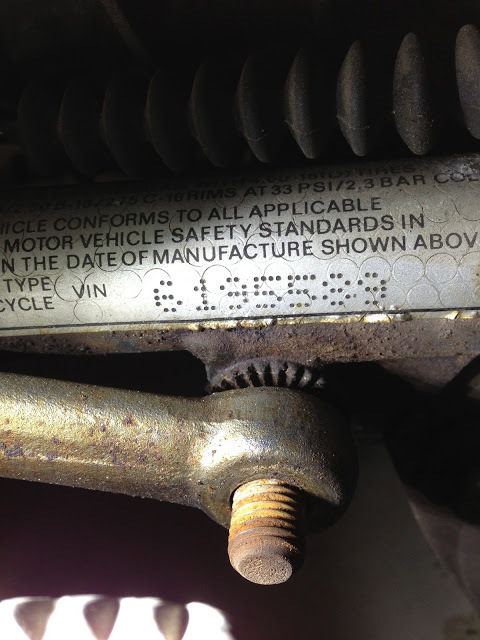
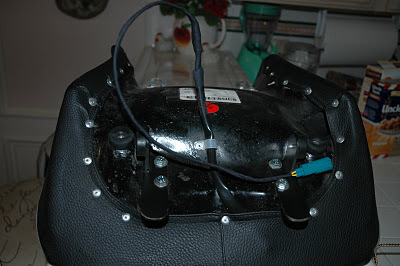
credit card. After a short time you will be given your permit, check it 
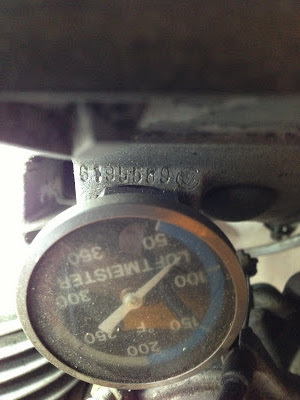
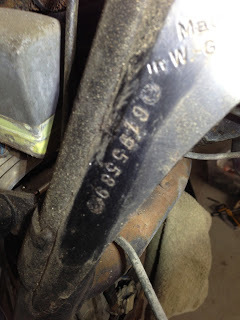
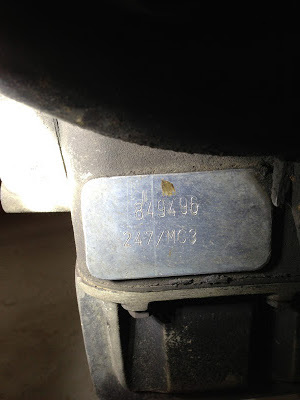
carefully. Make sure the VIN number is the same as the one on your Vehicle registration document and on your bike (usually on the fork or lower frame of your bike). Once in the interior it is possible to be checked for consistency so check it yourself. That permit will cost about $28 dollars.

You will also need insurance for your bike to travel into Mexico. Your regular insurance only covers travel in the US and within the frontier of Mexico and not any travel within the interior of Mexico. The fee an insurance company charges is based on your bike’s value and the number of days you’ll be in Mexico. As an example, a six day trip on a bike valued at $23,000 costs approximately $113. Carry proof of insurance.

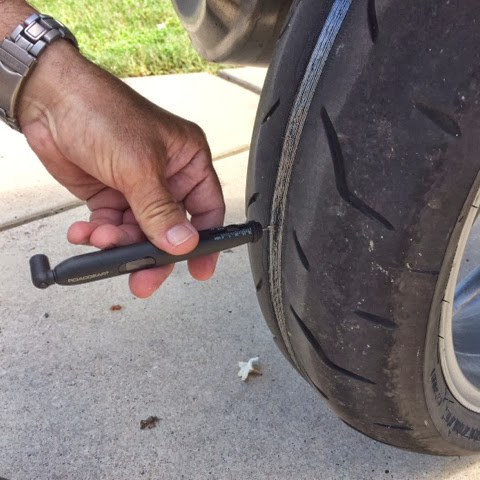
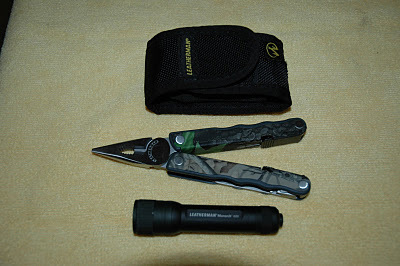
It’s always a good idea to pack a couple of days before your trip. If you’re like me the anticipation of the trip won’t let you sleep much the night before the trip so don’t make it worse by trying to pack when you should be trying to sleep. We all know how to pack so I’m not going there (rain gear) except to mention a couple of things that you may need 
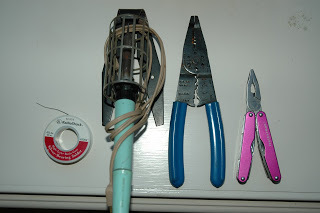
which typically don’t come to mind riding on US roads. In Mexico roads can be rough so it’s always a good idea to take nylon tie straps, duct tape, baling wire, and lock-tight to keep from losing things that can fly off your bike. It’s better to tie down that XM Radio or GPS unit than to test how well it’s mounted! There’s a more complete list attached as appendix A.

Getting through town can be an experience all its own, but don’t let that set the tone for your trip. As soon as you cross into Mexico you’ll pass through customs, as you ride up you will see a set of lights much like our traffic signals, but these only have two colors, green and red. Typically, you’ll get a green light which means that you don’t have to stop for inspection. If you do get a red light you proceed into a bay, usually to your immediate left or right and someone will either wave you in or just have you stop wherever they are stationed and ask where you are headed and what you may be carrying. It’s important to note that any type of fire arm or bullet or even blank cartridge will send you straight to an arrest, sent to local jail then a federal prison somewhere in the interior of Mexico. My neighbor accidentally took his revolver in his trunk and spend a couple of months in jail, cost him over $10,000 in legal fees in Mexico, and lost his car since it was impounded (or confiscated by someone needing a better ride). They take this very seriously and even guys that know people in the right places don’t help much. So check your bags carefully, under your trunk mats or saddle bag liners, etc. just to make sure you don’t have an old shotgun shell from a bird hunt or something like that. Of course, I go into Mexico frequently and have never had any of those problems, and it’s been years since I hit a “red” light at customs. So in all likelihood, it won’t be an issue, just worth noting.

Once you’re past customs you’ve got to make your way through town and on to the open roads. If you cross in a big city like Reynosa then you can expect to take a while to finally get through town. If you cross in at less crowded points like Progresso or Harlingen or even Pharr you can make it through really quick. The best way to get through town is look at the signs, know which general direction you’re going and you can ask at any corner which way to your destination. People are really friendly and are more than willing to help or even lead you with their vehicle to your point. There’s some common Spanish questions attached as appendix B which will help you communicate while in Mexico.

In town driving is usually hectic. Be careful and keep alert. Intersections are very dangerous so make sure you have the right of way before assuming that you can just fly through them. Traffic signals are the same as in the states, but before the red light comes on, the green light will start flashing to warn you that it is about to change from green to red. Intersections without lights and with or without stop signs must be crossed using common sense and courtesies. It is not unusual for someone to allow the entire group of riders to cross, but be careful.

Highway driving in Mexico is also different than in the states. Since there usually are a limited number of lanes someone is always trying to pass you. They come up awfully close to your rear and when they pass don’t be surprised when they start moving over before they are actually passed your bike. Don’t fight for your space the norm is that you slow down enough to give that person the lead. It’s usually a good habit to give to much space between yourself and the vehicle in front of you. Drivers only take that as an invitation to pass you up. Likewise, when you want to pass, especially a truck, they will turn on their left turn signal as a sign that all is clear up ahead. Most passenger cars give the same signal. So if you are up on a big truck and you don’t get the signal it is certain that there is an oncoming vehicle.

The autopistas, or expressways, are usually very good and it’s easy to cruise at a good clip.

About 22 kilometers (13 miles) outside the city is the first real checkpoint. You may be asked to open your saddle bags, trunk, etc. and to see your permits. If it’s all in order they’ll wave you on and you’re officially in the interior of Mexico.

Those steps; crossing, customs, getting through down-town and the 22 Kilometer checkpoint are probably the most stressful and you’ll welcome the open highway. The highway comes in various forms and shapes. The best roads are the Autopistas (Expressways). These are toll roads and they usually are not cheap. For example, the toll on the autopista from Reynosa to Monterrey is approximately $20 (US Dollars) for an automobile, less for a motorcycle. If you want to make time these are the roads to take, usually the return routes.  Non toll highways are usually two lane with two way traffic and often with no shoulder to pull off onto. 

Speed control in cities and small villages is controlled by speed bumps called “Topes”. They are very effective and work well at slowing down every mode of transportation. Big trucks and buses are the slowest to get over these topes and if you get stuck behind one it will be a slow moving process. I usually try to pass them if the oncoming lane is clear. Harleys with lowered kits and BMW LTs with the new hydraulic center stand will almost certainly hit bottom so your speed has to be very slow, but not slow enough to stall over one of them.

There are typically three types of topes. The most common is the speed bump made of asphalt or cement and usually its just one, but you can encounter a series of topes. Next is the steel bullets which should be crossed by riding in-between the bullets. The last is the vibrator type which is a raised rippled cement tope that will definitely vibrate any loose part off your bike. It is a good idea to tie down your accessories like XM radios and GPS units so they won’t fly off at an inopportune time. Bikes with knock-off mirrors like the BMWs should have their mirrors tethered. Of course, you can get lucky on some topes which have a small gap in the middle which you can ride through or around the edge, either on the opposing lane or off the street. Usually, the shortcut off the road only presents a pothole that’s worse than crossing the tope.

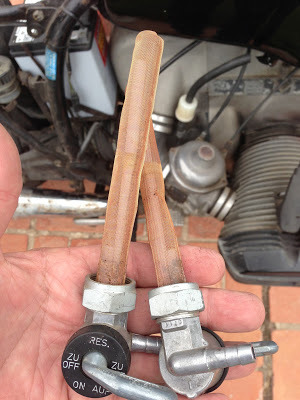
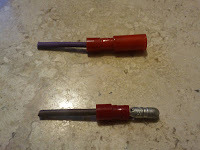
Right about this time you’ll be looking for gas. There is only one nationalized gas company in Mexico, Pemex. There premium grade is good gas and 92 octane. Typically, the regular gas hose is colored green and the premium is red so you can just ask for the “roja” 
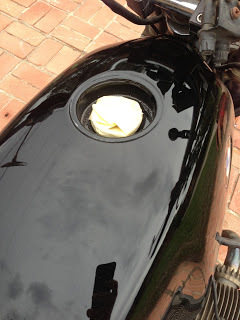
(red) brand. You need to remover your tank cap, but there is no “self service” in Mexico. An attendant will fill it up for you and usually they are careful not to spill any gas on your tank. You’ll pay them in pesos so typically you’ll be paying about 80 pesos per stop. Don’t gamble on running too low, some Pemex stations are few and far between so it’s not a bad idea to “top off” unless you know the next town is well within your bike’s range. It’s not necessary to tip the attendants. The diesel pumps are usually at separate islands so make sure you don’t pull up at those pumps. It’s not unusual to pull up to a Pemex station with lines of vehicles waiting to be gassed up. Almost all stations have directional arrows indicating which side of the pumps you should pull up to. If the opposite side is open just swing around and enter in the right direction otherwise you may get blocked off. Once you gas up pull away from the pumps being careful not to stop where the truck lanes begin for the diesel pumps. Once out of the way you can take your time to get your gear back on or to take a restroom or snack break.  The Restrooms often charge one or two pesos for us so it’s always a good idea to have spare coin change in your pocket.

Every town has multitude of restaurants, many with sidewalk tables which will serve up a nice hot meal. Order a soda or “Topo Chico” (mineral water) or a soda to drink. It is smart to stay with bottled water or drinks than to drink the water or eat the ice.

Hotels:

Just about every town has at least one or more hotels. Prices are usually set, but if you’re in a group you can ask for a discount and you will usually get it. The bigger cities have American Hotels like Hilton, Hampton Inn, Holiday Inn, etc. All of these hotels take all major credit cards. The amount shown on your receipt will be in pesos so don’t panic when you see the receipt. Your credit card company will automatically convert the charge to dollars on your statement.  The smaller cities do not. Air conditioning is not a standard option so you have to ask if your room has air conditioning. Ask to see the room if you have time and try the unit before you unpack. Typically, the AC units are window units and they can be on their last cycle with little cooling ability or motors whining so loud that sleep is impossible. Amenities are rare. Things like hot water, shampoo, and soap may not necessarily be available so it’s a good thing to check it out. Most hotels have never heard of ADA standards for the handicapped so don’t be surprised to find steep narrow steps, shower step-offs more than twelve inches, and other inconveniencies. Don’t expect WiFi, Internet Ready, or telephones in most rooms. Most hotels do have secure parking areas so ask if that’s available. I have found that in most small villages your gear is safe, but I always remove most gear, that handy toll money, sunglasses, and lock the bike up for the night. Many times they will also offer to wash your bike for about twenty pesos ($2.00). If you don’t care about your paint job then it’s a good deal, but more often than not the water they use is the same bucket water they just used on the big suburban parked next to you.

Communications:

Communication with the folk back home is usually done via mobile cell phones so it’s important to see if your carrier provides any type of service in Mexico. Take your phone charger and make arrangements to have at least one phone within your group with service in Mexico. It’s always a good idea to share phone numbers with everyone and with their relatives. Getting separated in Mexico can be stressful and sometimes the only way to reach someone is to call their home or close friend back in the states and have them call your friends giving them location instructions. It’s always a good idea to agree on rally points should you become separated. Don’t leave everybody guessing as to whether you went on ahead or turned back to look for your friends.

Bike to bike communications via CB radios is a real plus in Mexico, especially if you’re caught behind a huge truck carrying sugarcane and smoking down the highway at about 15mph. It’s always nice to have the lead bike communicating with the sweeper at the rear and giving him the okay to pass.

Clothes:

Weather in Mexico can vary from hot to hotter and cold and rainy. It all depends on where you’re headed and what time of year it is.  Good rain gear is nice as well as warm and/or well ventilated clothing. Of course, sunscreen and lip balm are always a plus.

Once in town it’s always nice to have a good pair of sandals and shorts for walking through town.

 Trips:

There are many types of trips you can take and you can certainly vary the time and distance to fit your schedule. We have outlined some weekend trips, followed by some longer trips as examples of what to do, where to go, and how much you can accomplish on your trip. There are also the hard core riding trips and the leisurely paced trips. Terrain always dictates how many miles you can cover in a day, but generally speaking a hard-core ride covers about 350 miles a day and a leisurely paced ride covers 150 to 200 miles a day.

Harley Davidson Ultra Inner Fairing Install

Ricardo Perez

Finished Product with Chrome Rings on Gauges & Speakers
Weekend project: A good friend just happen to have an extra inner fairing that he had in storage. He typically orders a painted one on all of his new bikes and even though he's on a 2010 Ultra he had an unused one lying around from his 2008 Ultra. I wasn't too crazy about the idea of getting a painted inner fairing, but my local dealer had dropped what I believe to be brake fluid on my inner fairing and left an ugly bald looking spot on it. So I figured even if I didn't get it painted it would be much better than my current stock fairing. After that weekend I decided to have it painted to match my copper top 105th Anniversary 2008 Ultra Classic and if it looked too much over-the-top I would just hang it in my workshop. The match on color was excellent so I decided to go for it.
I thought about taking the bike in and having it done by my local dealer, but I figured that they would charge me at least three hours labor, a high price to pay just to have a look at it installed. I found an excellent posting on HDForums http://www.hdforums.com/forum/touring-models/575814-inner-fairing-removal-step-by-step-w-pics.html which provides an excellent description on the removal process so with iPad in hand I dove into it.  I had my iPad in the garage ready to refer to that posting anytime I needed to remind myself of what to do next. I planned to do a step-by-step instruction, but bubbas1 in the above referenced post covered every detail you need to know as well as having pictures of each step.
Newly Painted Inner Fairing
Here's my Harley before I started the project.

The process is not too difficult just detailed in that there is much to disconnect. As you can see on one of the photos, I labeled all my disconnects just to make sure I got them back not only in the proper order, but also in their original location. Most connector are dummy proof in that each end will only plug into the correct connector, but I took no chances and labeled each and every connection.
Removed Outer Fairing
Remove Inner Fairing
Removing the Outer Fairing is a snap compared to the Inner Fairing, but once you have everything disconnected the Inner Fairing slides out and up (toward the back of the bike). The hardest part for us was removing the snap ring on bottom of the pin which holds the clutch lever. Without the proper tool to remove those snap rings it can be a hassle. My brother dropped by to help me out and he was able to slide the snap ring off using a couple of small screw drivers. Once I started the reassemble process I made sure to use Dielectric Tune-Up Grease on all my connectors.
Back To Normal

After Installing New Inner Fairing!
Well here she is after the new Inner Fairing. I must admit that the bike looks radically different, like a custom bike. I hadn't expected such a face lift so I'm glad I did it. The project took me about four or five hours, but I was going very slow since I wanted to make sure all my connections were correct. Having done it once I would say it would take no more than a few hours to do it again. Another additional advantage to doing it myself is that I now feel very confident in replacing any of my gauges, especially the famously inaccurate "air temperature" gauge for an oil temp gauge.  Save yourself a chuck of money and do the job yourself and you'll be glad you did.


BMW Service Woes

Tomas Perez

Pancho & Tomas 

I'll have to post my own experience with my last BMW dealer service visit. I don't look forward to bashing one of our very few dealers but the purpose of this blog is to help fellow riders in any way we can. To be fair we need to publish both positive and negative experiences with dealers, Internet stores, equipment, etc.

I kept a record of dates and times but I'll just recap in this posting. I've yet to return to the dealer and see if he can make good on my last service request. I called my dealer (where I purchased a new 2010 R1200RT) on a Saturday and schedule a warranty service in 2 weeks time for a Thursday. I scheduled Thursday because I had a rally not too far from the dealer's location for Friday through Sunday. My service request was pulsating front brake, gas gauge not accurate, and cruise control switch not working except for the on function.

Since my dealer is about 260 miles away I need a very early start in order to get there in the late morning and still give them most of the day to work on the bike. I can't afford to leave the bike there for day or even weeks so I schedule my visits and tell the service dept as much as I can in case they can order the parts ahead of time (normally they don't).

1) I get there at about 10:30 AM on Thursday and the service manager tells me that nobody scheduled my service and there was no way he could service my bike since he had no parts for it. He talks to the parts guy and tells him to order all the parts. If he orders before mid afternoon he can have the parts in overnight. I tell them I will go on to my destination but can return Friday or Saturday if the parts are in.

2) I call Friday morning to see if the parts are in. Parts guy says they are not in but should be in later on Friday. He goes on-line while I am on the phone to check shipping status. Therefore Friday is out as a service day. Maybe Saturday...

3) On Saturday I call again. No parts came in. They tell me that they did not get in on Friday and they don't get shipments on Saturday. I start to go into oh-oh mode. This does not sound normal. I've dealt a lot with shipping and these companies are good. Seldom do they not meet deadlines. I tell the dealer that I will not return home on Sunday and instead hotel it for a day and wait for Monday service.

4) Rally ends Sunday morning and I ride to dealer's town and get a room for the night. This is my second time for a room. Remember, I had to get one for Thursday also.

5) Early Monday morning I go to the dealer's and wait for parts and they take some parts off of my bike. The status is a) that the rotors are within spec's and will not be replaced. b) their bike computer is not working so they cannot check the fuel strip. They want to check it before replacing it. c) the cruise control switch did not arrive. The SM suggests that I wait while the "main office" helps them fix their computer (diagnostic system I presume). At least the fuel gauge problem will be addressed.

6) After waiting about 6 hours I start to push for answers since I haven't heard anything from them. It's 4PM and I ask where the "main office" is located. I learn it is on the east coast. I ask the SM "well aren't they close by now?". He says yes.

By this time I am very upset. Only a few items were off of my bike like saddle bags and tank bag. I wonder if they even had any intent to service my bike. One reason I think that is the case is because the SM walked around the shop asking guys if they could work on my bike when I first got there in the morning. I told the service manager that I wasted two days and $215 on hotel bills for nothing! I expressed my displeasure for a few minutes before I rode off. By now it is just past 5pm meaning I am hitting the peak of rush hour plus I will be getting home at about midnight or later.

My friend with an identical bike needs some service on his RT and asked me if I was over my incident so that I can ride up with him. I told "not really.. but I need to take my bike back". We don't have too many options on dealer service. We have to live with what we got for any warranty work.

I just think the dealer (Service Manager) had so many better options but he elected to do about the worst thing he could have done. At least replace the fuel strip. We BMW guys know that only too well. He said he wanted to calibrate it first to see if that fixed the problem. Or at least tell me that he could not have fixed it and I would not have wasted the entire day in his lobby! And how could he service all the other bikes in the shop without his computer system? Perhaps they were in mundane maintenance mode that week.

This too shall pass...
tsp

Update - Feb 17, 2012
Drove to dealer for fuel strip problem and cruise control switch.  Fuel strip was replaced but the wrong switch was ordered.  The right switch was ordered and over night delivery was requested.  I was asked to stay another day which I did.  On Saturday, Feb 18th I went back to the dealer only to discover that the part was not making it to the dealer until Monday.  Two more days of hotel rooms was not worth the wait.  My hotel bills have now far exceeded the cost of the switch.

Update - Mar 2, 2012
Took the bike back to the dealer for the cruise control switch.  Since I was there last the horn button also quit working.  That makes 3 switches on the left side that quit working (the first was the wind shield switch).  All is good now... finally.

Harley Davidson Service Woes!

Ricardo Perez

My 2008 HD Ultra Classic
My dad was a mechanic so naturally we grew up around cars and servicing vehicles.  One of my dad's cardinal rule was never buy a car that rolled off the assembly line on a Monday or Friday. That was back in the day when we would typically special order the car you wanted. Another "rule" that I've learned along the way is to never take your vehicle in for service right before any holiday. Well, I violated one of my cardinal rules and took my Harley Ultra Classic in for a new rear tire.
I dropped the bike off on Wednesday afternoon, December 28th. I use Metzelers and made sure they noted that. The Serviceman recommended doing the 40K service since I was approximately 1,200 miles short of the 40,000 mile service interval. So I said sure, and while he was at it he might as well do the state inspection, put the nostalgic type grips on, replace the brake fluid cover since it was leaking, a warranty issue, and either fix my battery operated oil dip stick which went south soon after I bought it, or replace it with the stock item.
He said that the bike would probably be ready by Thursday afternoon. I called on Friday morning asked if bike was ready and was told, "yep" just finishing it up now. Of course, we all know that's code for, "he hasn't started yet".  So I said I'd pick it up before their 6pm closing time. While I was on the phone he mentioned that everything was okay except the nostalgic grips were not available for the TBW (throttle by wire) bikes. I politely mentioned that I had asked the service guy if those were compatible with the TBW bike and, of course, he had said they were.
My wife drops me off at about 3:30pm and the guy at the counter asks me if I had already paid for the tire as he's tallying up my invoice. I hadn't paid for it and said so, adding that it must be a New Year's complimentary item. He says well it's not on the invoice expecting me to understand what that means. He then starts a phone conversation with someone back in the Parts Department and after a while finally decides to go look at the bike. When he returns he says that they hadn't put the tire on. I just dejectedly say, "that's the only reason I brought the bike in for".  He wondered out-loud if it could be done before 6pm as he looked at the serviceman that worked on my bike. He got one of those blank stares that says, sure it can be done by 6pm but what fool do you think is gonna do it. In reality, he never spoke. After another longer wait the counter guy tells me that the Metzeler is not in stock and it would take a week for it to come in. By this time I'm trying not to be an SOB just two days before New Year's Eve so I just tell the guy to get my bike because I wasn't wanting to leave it for more than a week. I really wanted to ask why they didn't check to see if the tire was in stock when I dropped it off, but figured that would only frustrate me even more so I didn't ask the obvious.
By the time I get home I notice that they didn't fix or replace the brake fluid cap as was on the work order or the dipstick. So then for the "coup de grace" I decided to look at the state inspection sticker, you guessed it, no new sticker.
Like Timmy said in the movie "Sandlot", 'I blame myself for underestimating the beast and going about this all wrong'. 
Of course, I didn't get out of there without paying about $440 for the 40K Service. Now the constant question that gnaws at me is, 'what are the odds of they actually doing what's on the checklist for the 40K service?' Gotta admit that the odds are heavily tilted towards the 'no way' side. 
Now I must admit that I'm just letting off steam; all in all my dealer is good and I must admit that they, especially the Service Manager has gone out of his way to make things right and I'm sure this won't be an exception.  Let's just chalk it up to holiday blues and better days will come my poor bike's way.  Anyway, Happy New Year!

20,000 and 40,000 Mile Maintenance
change oil and filter
clean magnetic drain plug change primary chain case fluid
clean magnetic drain plug change transmission lubricant,
clean magnetic drain plug lubricate the following:
front brake lever, throttle & cables, speedometer cable, clutch control cable and lever, jiffy stand, tour pack and saddlebag hinges and latches, shift lever, brake pedal, steering head fittings pivot shaft service and re-torque - flh - flt - fxr inspect and lubricate detachable windshield bushings inspect air cleaner, service as needed
test battery voltage & charging system output tighten battery connections, 
check electrolyte on wet cells check lighting & horn for proper operation check and adjust primary drive chain
check and adjust clutch and cable freeplay inspect engine stabilizers and mounts inspect fuel valve, lines and fittings for leaks 
clean tappet screen on big twin evo models 
replace spark plugs
check and re-torque critical fasteners 
inspect tires, tread depth & adjust pressure check wheels, 
inspect brake pads and discs for wear check and adjust rear belt check shock absorbers check air suspension for pressure and operation inspect oil and brake lines and fittings for leaks inspect brake fluid level and condition check engine idle speed and adjust as necessary check & adjust operation of throttle and enricher check ignition timing & vacuum hose on carbed evo big twin check cruise control operation
replace fuel injection filter
road test


What I Carry on Motorcycle Trips

Tomas Perez

Updated: 2012/11/17

I know there are hundreds of postings on what to carry on motorcycle rides and this posting is just one more opinion. My concept is to keep it simple (and light) but carry what you must. My joke to friends is "if you got your cell phone and a credit card that is all you need"... but of course I add a few items to that list.

My list:
1 - Windshield cleaner, micro cloths and regular shop rag (in fairing pocket).
2 - Multi tool.
3 - Flash light.
4 - Torx tools.
5 - Plug kit and air compressor.
6 - A couple of straps in case I have to strap something on the bike.
7 - Zip ties.
8 - Pocket knife and a micro multi tool.

I need to add a couple of notes at this time. I'm older now... maybe wiser... when I was very young my list included bungee cords and chain lube... and none of the items listed above. Point #2 - I recently added the items in #5 above. I purchased a new bike less than two years ago and got a flat at 612 miles. I had not even gotten home yet. It happened on the way home from the dealer. I had two more flats before the 3,000 mile mark. Just bad luck. I now have 23,000 miles on the bike without any more flats (I know I shouldn't have said that... knocking on wood...).

These items are in addition to my normal riding gear including rain gear. I got light and heavy rain gear. That also includes rain covers for the seat and tankbag.

I'm not recommending any particular product but I'll include photos of some of the items that I use.


This is the tire plug kit and compressor that I carry. I used it to plug the last flat that I got and rode the bike for a few hundred miles without any problems. The plug kit is in the tail section of my bike (R1200RT). Compressor is in a saddle bag.  Update: I now carry the compressor in the tail section also.  I now have both items with me at all times.  I moved things around and still have plenty of room left over in the tail section.


I like these Torx wrenches (Star Pro). At home I have the 3/8 inch drive types but I almost always use these to work on the bike. They are handy and pack small. I carry them in the existing tool pouch under the seat. Note: I'm currently riding a BMW motorcycle that uses mostly Torx fasteners. I did not have this tool set on my Honda.


I used to carry the Leatherman 300 but found it a bit heavy for carrying in a tank bag. I found the flashlight and Leatherman Fuse on sale at Academy for I think $25.88 for both items. The flashlight is very good. It's the Leatherman Monarch 400. It shoots a beam of light a long ways thus not the best type for road side repairs where a flood type is best but great for campground or search type use.  These I now carry in the fairing pocket.

Update 07/23/2012 - I am adding another flashlight to my touring package.  I purchased a FourSevens Quark Pro QP2L-X flashlight.  The Leatherman 400 is rated at 45 Lumens for 1 hour on one AA battery.  The Quark runs on 2 CR123A batteries and has 8 operating modes - moonlight, low, medium, high, max, strobe, SOS, and beacon.  Moonlight is 0.3 lumens and runs for 25 days!  The other settings for regular light functions are 3.0 (5 days), 65 (11 hours), 160 (4 hours), and 360 (1.7 hours).  This is a much better flashlight for long term use (for example camping).  FYI: There is also a MiniX that is about half the size and uses only 1 CR123A battery.
I also ordered a Preon 1 from the same company to use as an EDC.  That unit uses a single AAA battery.

FourSevens Quark Flashlight


Leatherman and SOG Aegis

I always carry these on the road and whenever I'm in casual wear. I have a few knives that I use but the SOG Aegis (about $70) is one of my favorites. I now carry the Leatherman Micra (about $20) also because I have used it so much recently. Not just for bike stuff but everyday stuff. Matter of fact someone borrowed it a few days ago to install batteries in their kid's Christmas toys. My tool box was out in the garage but the Micra did the job.
Update 2012/11/17 - Why the SOG Aegis?  It's large enough to get most cutting jobs done yet not so large not to fit in any size pocket.  The blade opens very easily and only one hand is require to open the blade.  By the way, you can also lock the blade in the closed position if you want.  It's very light for the size of the knife.  I think it is 3.1 oz.  The lock blade mechanism is very solid.  The clip is located very high so that when you have the knife in your pocket very little of it shows.  BTW, this is a tip up only carry.  That is not a problem with me - I prefer tip up carry.  The clip can be switched to the other side so that it becomes a left hand carry.

I probably forgot an item or two but these are the main items I carry. Like I said, the older I get the more items I carry. And I still want to add a few items like siphon tube, jumper cables, more tools, trail mix, etc. At any rate, this is my list - some carry more, others carry less. This past summer I met a guy riding from South America to the USA, then Canada, and finally Alaska. Not sure of all that he had on board but we did learn that he had two helmets and a final drive for his GS.

I'm still considering two items that I've never carried before - a small siphon hose and jumper cables (motorcycle type of course).  I would go with the siphon hose before the cables.  One of the guys that I often ride with carries jumper cables which he once used to help start another bike.  Both of these items sure are handy when you need them.

tsp

How to Wire a Corbin Seat to a BMW R1200RT

Tomas Perez

This is more of a How To than a product review but I want to limit the number of categories in this blog. I wish the program would allow us to have sections or categories so that it would be easier to navigate.

Anyway, back on task. I purchased a BMW R1200RT to replace my 2003 ST1300ABS as soon as the 2010's hit the dealers. My last two bikes had Corbin seats (rider only) but since I paid $350 for heated seats on the RT I told myself that I would grow to love (or at least like) the stock seat on the RT. By the way, I got a normal RT i.e., not lowered and the "normal" seat. Well.... after about 15,000 miles I got a chance to purchase an almost new heated Corbin rider saddle. The stock seat would burn my butt on long tours and never was as good as the Corbin on my Hondas so I took the plunge.

I wanted a clean install without cutting any wires on the RT. Of course that meant that I had to cut the plugs supplied with the Corbin seat. Not a problem for me.

Short answer is that you need to purchased a BMW repair plug. There is a difference between the seat plug or any other plug on the bike and a repair plug. The replacement cable is the entire cable - end to end. The repair plug is only one end of any cable on the bike.

This is what you need for the heated seat connection:


I want to thank Rose from Max BMW for helping me in my search for this plug. The cost was $16.12 plus shipping.

Now for the long answer... for those new to making changes to their expensive motorcycles...

The Corbin came with these very unBMW pin connectors...


As you can see I cut them off the seat. If you don't want to cut the Corbin connectors you can buy these connectors at any auto parts store and connect them on the wires of the repair plug to connect to the seat but why do that? You simply end up have a wire with two different plugs on it. The repair kit came with 3 crimp type pins and 3 of what I think are clear heat shrink tubing (see photo above). I'm saying I think it's heat shrink tubing because I had to apply much direct heat from the soldering iron to get them to shrink.

And... not needed but I did it anyway (OCD impulse?). I soldered the crimp pins before I put the heat shrinking tubing on them. Warning: Be sure you slide these little tubes on the wires before you connect them to the seat.

You just need some very basic tools. This is what I used.


Like I said, you don't really have to solder the connections but you can't beat it for a good, reliable electrical contact.


This is a picture of the repair plug connected to the bike and wired to the seat. Sorry for the quality of the picture - it's from my phone camera. I put about two loops of electrical tape on the shrinkable tubing just to keep them together. I'm going to wrap the yellow wires with that black sticky cloth tape just to keep them tidy. You can also use a spiral wire sleeve that is small or buy a small sleeve and slide it on the yellow wires before making your connections.


Works great and it's a clean install. If you want - you can unplug the Corbin and connect the stock seat and then go back again whenever you want. If you sell the seat the new owner can only be happy that he or she simply plugs the seat in and away they ride.

If you have any questions - email me or post a comment. I'll follow up with a review of the Corbin saddle compared to stock after a winter ride.


I finally applied the cloth tape to the yellow wires. The above photo shows the final product.

Thanks for reading...