Contact Us

Use the form on the right to contact us.

You can edit the text in this area, and change where the contact form on the right submits to, by entering edit mode using the modes on the bottom right. 

800 S. Francisco St.
Mission, TX
USA

Our website is all about motorcycles, especially BMW cycles. We cover rides in the Southwest and Mexico, motorcycle modifications and review motorcycle products. 

Big Bend National Pk.jpg

Reviews

Schuberth C3 Review

Tomas Perez

Schuberth C3 - The World in black
This is a short review of the latest Schuberth C3 helmet.  My recent helmet history starts with the C1 that I replaced in late 2005 with the tri-colored C2 in black, white, and silver.  I chose that color because it matched my 2003 Honda ST1300.  In July I broke down and purchased the C3 World in black mostly because my old helmet was showing signs of wear on the form area around the bottom of the helmet.

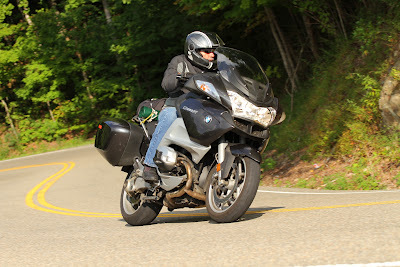
The decision to buy came about because several sources told me that no discounts were offered on the new helmet so when a vendor advertised 15% off on all orders over $300 I pulled the trigger.  In addition I was preparing for my yearly long tour.  I wanted the new helmet for the ride and it served as a good 4,400 mile test ride.  I don't recommend taking a helmet that is only 2 days old on an extended ride but it fit me rather well even when brand new.  By that I mean that it was a firm fit but not too tight.  The helmet broke in even better after about 3 days of riding.

Size - The C1 and C2 are both XL.  I tried the Large size a couple of times but it simply was too tight on my face. The C3 is the same size as my older helmets.  Schuberth helmets run on the small size.  All my helmets prior to the Schuberths have been Large.  With the Schuberths I had to go up to XL.

Comfort / Features - First positive impression was the weight, or lack thereof, of the C3.  After so many years with the C2 I noticed the lighter weight of the C3 every time I turned my head to check traffic.  Second, the center chin bar release button makes opening the helmet a one handed operation.  The C2 requires 2 hands to open.  You can open a C2 with one hand but it's not easy.  Opening the C3 with one hand is a natural action.  Third, dropping the sun shield is easier on the C3.  If you grab the chin bar with your left hand your thumb falls on the sun screen lever.  Fourth, I noticed a better upper vent air flow.  Not much better but better nevertheless.  I need to add that the face shield seems to stay open at higher speeds better than the C2.  Once again, it's not a big improvement - just slightly better than the old helmet.  The inside head liner is better on the C3.  It has much better padding.

The one item that I am negative on is that the chin strap rides all the way back under my jaw and sometimes it pushes against my throat.  I have to grab the strap and pull it forward every so often.  If I rotate the helmet back on my head the problem does not exist but it doesn't feel as natural on my head(at least not yet).

I'm neutral on the chin strap racket attachment system.  On the C2 you could adjust the strap for size and it always clicked into place whenever you locked the chin strap.  I found myself setting the C3 a little too tight and had to adjust it while under way.  I'm learning the number of clicks that I need to hear or feel for a proper fit.  The C3 method might be a better solution if you use different types of helmet liners making it easy to snug up.

I'm also neutral on the face shield sealing.  Once during my 10 day tour I got small water droplets inside the shield while riding in the rain.  I'm neutral at this point because this happened only once.  I'm thinking I did not seal the shield properly that one time.

Wind Noise - Much better than prior helmets.  I find myself doing more riding with the bike windshield down and the helmet face shield closed.  The helmet is quiet if you are in a steady stream of air.  Have your head in turbulence and it's no longer quiet.

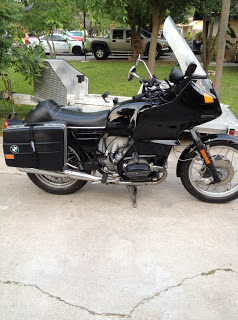
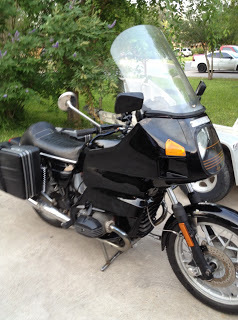
Quality - Top notch.  The helmet and face shield construction shows attention to the details.  The helmet has ridges in front and back and the face shield has little triangular bumps along the top edge.  I'm sure these are the result of wind tunnel testing.  The paint job is awesome.  I got the black for the looks and it kind of matches my bike.  The white would have been better choice because I live in a very hot climate.  Another reason for not choosing white is that one of my riding friends has the White The World and I didn't want to copy him.

Cost - Expensive.  The model I got cost $749.  The solid colored models cost $699.  Recall that I got 15% off plus free shipping.  I might add that my second choice helmet cost $650 at the dealer.  I justified the extra $50 and then upgraded my order another $50 to get the World model.

Notice - I regret not installing the fog shield for my trip.  I could have used it when we hit rain.  I'll update this review once I try it out this winter.

TSP Rating: 4.5 (1-not recommended to 5-recommended)

tsp


PIAA Slender Horn

Ricardo Perez


PIAA Slender Horn
I purchased the PIAA Slender Horn to replace my stock horns on my 1979 BMW R100RT. They're a simple replacement with two leads, one being for a ground wire to the chassis.

Here's what PIAA says about this horn:  The “Slender Horn” represents a lightweight horn that is the world’s thinnest spiral horn. It is a new horn with the world’s thinnest body in the popular “400Hz / 500Hz” bass range.


Stock Horn
The stock horn on my '79 BMW RT is attached to the frame by a flat metal blade and using a size 13mm nut and bolt which is easily removed. The tab on the PIAA horn places the horn at a different orientation, more downward direction than forward. The instructions make it clear not to remove the attachment tab on the PIAA horn because it's vital to the vibration which produces the "honk" so I didn't mess with that tab.

The horn is much louder than my stock horns, but they're also new. It's a simple install and a neat upgrade.


Stock Horn


PIAA Horn Installed: Much Smaller than Original


Leads with Ground Lead 

Review: The "S" Plug Canal Buds

Ricardo Perez

Splug
 I typically use ear plugs while I'm riding, especially when on the Harley with those Monster Ovals. I have a narrow ear canal so over the years I've had some issues in finding the right sized ear plugs. After riding 13 or 14 hours with ear plugs (and sometimes sleeping with them when I share a room with my snoring brother) my ear canals hurt so I've been careful to get the right size for myself. On my last ride I was on my '79 RT which has no radio or stereo so I was without any music or news at all. I picked up a pair of TheSplug at Hank's Motoshop in Dilley just to try them out. They blew me away with the sound quality.
theSplug
I was also impressed by the feel and the fact that when you're putting on a helmet the helmet doesn't knock them off or even pull them out of place. I plugged them into my iPhone and cranked up the volume, mistake, it only needs to be at about 40 to 50 percent volume to hear things clearly with the bike running. I just popped the iPhone into my inside jacket pocket listening to Pandora Radio for the next three hours.
As you can see by the photos, the ear buds are small and unobtrusive. At one point we stopped to put our rain gear on and while doing that I got a phone call which I took without a glitch, but it's unlikely you can do that while traveling at speed since the Splug does not have a microphone. For me it serves two main functions: (1) they now replace my standard ear plugs, and (2) they offer exceptional quality that's bound to make any long highway seem much shorter. I'd give these a solid 8 points out of 10. Big plus: incredible sound transmission, won't fall out and Big Minus: no microphone. They're about $140 and the Dual Driver is about another $100. Happy listening.


BMW 1979 R100RT: Part III - Test Ride

Ricardo Perez

Fuel Line Filter
I finally got a chance to take the bike out on its first maiden run; a short 85 mile ride. I've had the bike put back together for a few weeks now, but every time I'd take it out the carburetor float bowls would start leaking, usually within five miles of taking off. I would just pull over and take the bowl off, let some gas run through the needle valve and pop it back on. Good to go for another four or five miles!
Of course, the inside of my gas tank is rusty and it sitting at the painter's for over a month sure didn't help. I know I've got to treat that tank, but it seems no one sells the solution I'm looking for in South Texas (it's a water soluble thing called Evaporust). Well, it finally dawned on me that I should just put in a pair of small and inexpensive fuel line filters. I picked up two of the smallest I could find at Autozone for $4.99 each, cut the fuel line, and popped them in. Took less than five minutes. My brother said he did the same thing years ago with his Honda CBX (six cylinder) and said that after the filter clogged the bike stalled on him on some lonely highway. He just punched a hole in the filter with a screw driver and kept on riding.
We left Saturday morning for a breakfast run to San Isidrio, Texas. Those fuel line filters worked like a charm. About 35 miles down the highway I opened up the throttle a bit and went from a pedestrian 65mph to 85.3mph according to my Garmin GPS. I know it's accurate because it's been certified by radar in the Texas Hill Country.  According to the local Sheriff in Camp Wood he said he clocked me at 65mph in a 55mph zone and I had my cruise control set right at 65mph, on the Garmin not on the speedometer.
The bike ran great, smooth and once it warmed up it shifted smoother and just ran better. It idled perfectly at 1,100rpm and should do much better once I get the carbs tuned. Of course, the bike feels much taller and nimbler than my Harley Ultra Classic. I did notice a little wavy (loose) feeling in the rear section as I held the bike at 85mph. I'm not sure if that was because of the wind or some mechanical issue. At 75mph it was totally smooth; at 65mph it was smoother, very quiet, and felt like it could stay at that speed forever.
Once I got home the only noticeable problem was some gear oil weeping from the gear shifter shaft entering the transmission. Maybe that's due to my replacing all the fluids with synthetic oils and perhaps I should go back to the old dino oils. I'm ordering the new seal and that should take care of that problem. I also felt that the saddle just wouldn't do on a day-long ride so I may look at getting a Corbin saddle to replace the custom job on there now.
Conclusion: Yes, I'm very happy with the bike and just want to keep tinkering with it.


BMW Motorrad All Around 2 Rain Gloves

Ricardo Perez


BMW Motorrad All Around 2 Rain Gloves
I've got plenty of gloves, but only two favorites, these rain gloves and my BMW Motorrad Air Flow II. The Air Flow are just about perfect for South Texas' one season, hot! The rain gloves on the other hand are like the forgotten step child, just sitting around in my luggage waiting for that rare rainy day. So when they do get out they love it and show that by taking on any rain storm. We've ridden in some heavy rain storms, but I've never had a problem with getting my hands wet or cold. The double Velcro closures helps keep those cuffs from being too wide open and makes it easy to slip your rain gear sleeve right over the cuff without it becoming a major struggle.
These gloves have an outstanding reflective strip running along the entire length of the glove which really helps you be a little more visible especially at night and that's always a safety plus. These gloves are soft and the fingers are pre-curved so keeping a grip on the handlebars is less fatiguing on long rides. Of course, these gloves are bulkier than your average summer riding gloves; therefore, not as comfortable, but they do a great job of keeping your hands from getting too cold. These are not winter gloves and you'll feel the chill once you're riding in temperatures below the mid-forties unless you've got heated grips.
Rubber Visor Wiper
Far and away the greatest feature is that little rubber visor wiper on the forefinger. It's only on the left hand, the non-throttle hand, which makes sense. My little squeegee has saved my life more than once. I sit behind a fairing, but in a frog choker it doesn't much matter, you're going to get lots of rain on that face shield and that squeegee works like a charm. Riding in the Southwest now means we share the road with all those oil fracking tractor trailers and on more than one occasion I've had them splash me with a great mix of water and mud that totally cuts off your view, but thanks to that squeegee I've been able to just wipe away the grime and restore my vision.
Everything else on these gloves is typical BMW Motorrad quality. The leather is soft, fingers are pre-curved, palm is double padded, and outer palm is breathable Cordura 500 textile.
I'm not sure how many riding seasons I've had these gloves, but they remain like new with no noticeable wear other than on the useless label that I keep forgetting to remove. Anyway, those labels, three of them are sewn in so well that it would be wise not to rip them off, but carefully cut them off with a knife or scissors.
Double Layer Palm
The nice fleece-like material inside the glove makes it difficult to put your gloves on once your hands are wet which is often the case in my situation since I seldom stop before it starts raining. I always believe that I"ll squeeze in-between those clouds and avoid the rain! Of course, putting on any gloves with wet hands is always difficult. I've learned to push my hand inside the glove and set my fingers all the way inside the glove by pushing the glove between the fingers against my mirror stems (or brake/clutch levers). Of course, the best thing is always to put them on before you hit that rain.
So even though they mostly sit in my luggage bags the times they do come out is great. We've gone more than a few hundred miles in and out of rain and they have yet to let me down so I'm sold on my rain gloves. I never leave home without them.


Soft and Comfortable After Many Miles

Size 8/8.5

Double Velcro Closures


Rubber Visor!
Palm


Velcro Closures


Cordura 500

SmartWool Socks

Ricardo Perez

My poor feet. Once upon a time they could run a quarter mile bare with nothing but the callous on the soles. That was long ago, now stepping on anything other than a flat floor hurts and my toe nails are starting to resemble barred-wire. Since they now demand much more attention than when I was in my younger, I've since been on a seven year quest for good, comfortable socks. I think I've finally found a brand that fit and feel just right, Smartwool socks, made in the USA from imported yarns. I purchased a pair a few months ago at an Outdoor Gear store in Fredericksburg, Texas at full retail price of $19.95, but I noticed on the SmartWool website that they're about two dollars less than the $20. It takes a real effort for me to spend nearly $20 on a pair of socks so I had already made up my mine that these two pair would have to last me about five years before I sprung for another pair. Fortunately, my brother found these same SmartWool socks on special at Sierra Trading Post for just $5.95 a pair. My five year wait went out the window.
The SmartWool sock is 74% wool, 25% nylon, and 1% elastic and the one I use is the "Medium Cushion  Hiking Socks". I use them with my Sidi Street Boots and they are a perfect fit. It's true what they say about wool, it allows your feet to stay cool when it's hot and warm when it's cold. I used them on an 800 mile day and my feet felt fine.
SmartWool makes a thinner sock which I like using with my Red Wing Boots. It's the SmartWool Walking Socks.


SmartWool's logo is "seriously comfortable" and they are just that with ribbed cuff that keeps the sock up; reinforced sole; flat-knit side panel to prevent  bunching, and other features that make it my socks for years to come.

I've used them on long rides in the heat and in the rain and they were the last thing I had to think about. I have also used them while working on the yard and working in the garage and they never bunched up on my feet or made my feet feel hot and tired. These socks are advertised for walking and hiking, but in my opinion they're great for any boot wearer especially for those day log summer rides when the pavement is above 120 degrees. So yes, after years of looking for just the right pair of socks and  trying many brands I think I've found them in SmartWool socks.

BMW 1979 R100RT Project: Part II

Ricardo Perez

Work In Progress!

  Well I finally got my parts back from the paint shop. I worked on it a full two days, the second joined by my brother who helped me out quite a bit. It still needs the pin-striping work, but I got so impatient with the long wait on the paint job, five weeks, that I  just told him that we'd do the pin-striping later. 
Well it looks a lot better than it was back on February 29th when I bought it, but it still has a long way to go. Hopefully, I can now take my time with anything I tackle next knowing that I can take it out for a spin at any time. I plan on taking it on our maiden voyage this week, maybe doing a hundred miles or so to see how it handles and holds up. I have yet to get it up to it's sweet spot which I'm told is somewhere around 4,500rpm? Here's some of the basic things we've done to date on the bike. First off, we removed that very ugly seat, old styled fog lights, passenger riding pegs, and the Reynolds rear rack. We have new Metzelers on both front and rear, new front brake pads, new fork seals, new progressive springs in front forks, new progressive shocks, new push-rod seals, valves adjusted, carburetor float and needle valve, new clutch cable, new air filter, new oil filter, all the fluids changed, replaced seat with older seat more to my liking, new fairing mirrors, new front fork fender brace, and side reflectors on front and rear. Replaced many screws, nuts, bolts, etc. I'm sure I'm forgetting some things, but there's still lots to do. 
Before
Putting on the fairing can be a little hard, especially if it's just one person, lots better if you have help. I'm telling myself that now I'll go back and redo everything, but at a slower pace just to make sure I've got everything right. I'll make sure that every screw is the right one, and new without mixing some new with old. The important thing for me is that it run well enough that I can confidentially take it on an out of state ride this summer. 
New Fork Brace & Reflectors

Looking Good!

Needs Pin Striping

Ready to Roll


Wolfman Waterproof Bag Review

Tomas Perez

Wolfman Duffel Bag in the Rain


Wolfman Dry Duffel Bag


This is a short review of the Wolfman waterproof bag.
On my last long tour I used a SAC bag that was given to me by a friend.  Actually he gave me two bags but one seems too small and the other too large.  I used the small SAC bag on my last tour.  I had two problems with the bag 1) it was too small to hold what I couldn't fit into the saddle bags and 2) the bag is water resistant - not waterproof.  I was carrying my sleeping bag and thermarest on top of my seat along with the SAC bag.  Well... that was only good until the first rain.  A friend carried my sleeping bag for the rest of our tour.  The size of the SAC bag is 16 inches long and 10 inches diameter.  

Thus the reason for the purchase of the Wolfman bag.  I looked at several bags including the BMW Roll 2 but the BMW bag is currently selling for about $250.  That's too much for me.  The wolfman looks very good and cost me $103.99 with free shipping.  I got it through Amazon but the shipping company was Rocky Mountain.  I went with the medium size bag.  The official name on my invoice is "Wolfman Expedition Dry Duffel Bag medium yellow".  One thing I like about this bag is that it comes with lots of straps.  I think the total number of straps is 6 straps plus the hand and shoulder straps.

I put a few items in the bag that I will be carrying in this bag because they don't fit in my saddle bags - for example my sleeping bag and pad.  I also threw in a pair of riding pants, waterproof pants, under pants, camp pillow, and a pull over shirt into the bag for the purpose of taking these pictures.  This bag comes in three sizes. All are about 11.5 X 11.5 inches and come in lengths of 20, 24, and 28 inches.  Like I said - I went with the middle size.  By the way, my sleeping pad fits in the bag without having to fold it in half.

The bag straps on to my bike much better in this position
Here's the weird thing about this review... I've never used it on the road let alone in the rain.  But having said that I am sure that it will not leak water.  It's just too well made.  Look at the top photo and you can see that it does not even come close to sitting on the bags.  This size fits perfect even if you mount it lengthwise (see the photo above).  Comes with the straps that you need but I will be using my Rok straps to tie it to my bike.  I will update this review if I need to after I field test the bag.

Another piece of advise... don't fold the opening like I did in the photos above.  It fits and seals better if you fold the opening in small folds.  The straps on each end keep the fold closed on the ends.  The top straps keep it closed on top.  The straps on the seat in the photo above are used to strap the bag on to your bike.

TSP rating for this bag = 8. (1-poor, 10-best)

tsp

Update: Rode in rain and my stuff stayed dry!  In addition to the rain you see in the video above we rode about 400 miles in rain.  I had zero problems with water leaking into the Wolfman.

Grip Buddies Review

Tomas Perez

Original Beemer Buddy
Updated... (see bottom of article)

I got these grips mostly to make the grips a bit thicker than stock - not so much to reduce vibration.  To this end the grips feel just right when I'm wearing Summer riding gloves.  With winter gloves the grips feel a bit fatter than what I want.  I also got a chance to use them in cold weather.  The heat transfer seems to work fine in both low and high heat settings.  I guess they help with vibration also but I can't tell if they help in this area.

My weak points with the grips is that they look like an add-on item.  In addition they are a wrap around product not a slip on product therefore they have a seam the length of the grip.  The instructions say to place the seam where your hand and fingers don't touch it.  Good advise of course and that also places the seam near dead bottom for each grip.  The additional advantage is that you can't see the seam in that location.  My problem is that I still know the seam is there (it's like an OCD thing for me).  I'm also wondering how they will hold up with wear and tear.  My original grips were showing signs of wear with 24,000 miles.  Neither is an expensive item to replace.

The seam
The cost was $19.95 plus shipping and purchased here.

Update - 09/17/2012
After my long tour this Summer the Grip Buddies took a beating.  The ride was 4,453 miles in 10 days.  I am guessing I had 3,000 miles on the grips before my ride.  As a future point of reference I am at 33,000 miles on my bike.  The photos below tell the story.  The foam is cracked on the right grip and is wearing off on two different areas on the left grip.  I still like the grips but keep in mind that they seem to have a rather short life.  Not too much to complain about for a $20 (plus shipping) item.  As a point of reference the stock grips showed a little wear with a total of just over 20,000 miles.


Left grip - front view


Left grip - rear view


Right grip


Update - 04/08/2013
I removed these grip buddies this week.  Bike was at about 38,900 miles.  The wearing you see above was not too big of an issue with me.  The reason I removed them was that the left side grip was always rotating on the grip.  It's weird that the right side (throttle side) that is always being twisted did not move much but the left side did.  I think it was tension that was on it as I held the clutch in.  Anyway, I got tired of fixing it on the road so I removed them.  Rating changed to reflect this issue.

*****
Rating=5   Scale 1-10 with 1=lowest rating (save your money), 5=average, 10=An excellent product.

tsp

BMW R100RT: The Paint Job - Part I

Ricardo Perez

What Have I Done!
So I'm doing things my way and that includes doing a paint job well before I finish the mechanical work on the bike. I just couldn't stand the 'sort of' wine color of my RT and figured once it's my color it's really mine. Removing the parts to be painted can be a real job, especially when screws and bolts are frozen due to 33 years of never been moved. I started with something that wouldn't discourage, that being the side battery covers that just flip off once you remove the oversized rubber band holding them to the frame. That was easy.
Next came the front fender with the frame brace. The fender and brace came off easily, but the nuts that held the brace to the fender were flat blots on the underside of the fender and three of them would turn freely when I tried to remove the carriage nuts. My wife turned them with a 10mm wrench while I hung on to the 1/8th inch bolt lip with my channel grips and got them off. That two pieces off and making progress. I then removed the gas tank and flushed it out while I had it off the bike. It needed flushing.
Fairing sits on these two braces
Then it's on to the fairing. I had no idea of where to start so I moved to the vent cover and flap on the underside of the front fairing between the front forks and front engine. Those parts came off rather easily.
I next removed the headlight lens on the fairing. Its rubber gasket covers four screws that release the lens. Just turn the rubber corner down and insert your screw driver to release the lens. Remember its glass so it'll break. Set it aside somewhere safe. I then removed the front park light lens (the small narrow one over the headlight) and I reached in and unplugged the gauges on the dash.  Once I had the headlight lens out and pulled out the boot surrounding the headlight housing. I mistakenly began to remove the pockets on the inside of the fairing only to find that there is one screw on the bottom which was impossible for me to get to so I abandoned that strategy and slowly started to remove the bolts on the front brace. It was a tight squeeze but eventually I was able to remove all four bolts and the ones on the back brace under the gas tank. The fairing still didn't slide off so I removed some of the screws holding the center piece to the two side pieces. I only removed some of the lower part of the fairing screws since the top part is held together by the dash which has rivets holding it to the fairing, but that was enough to allow the fairing to open a bit and up and around the front brace and in one up and forward movement it was off.
Here's my bike with all parts to be painted 

So that was it for the tupperware. I decided to have it painted in black. We'll see how it looks. I removed the rear frame bracket to have it powder coated as well as the bracket for the fog lights. I'm making a list of things I need to replace. While everything is off I plan have a little mechanical work done on the bike. I need to replace the front fork seals, replace the seals on the push rods, redo the brakes, and check the points.

Now that I have it apart I hope to take pictures as I put everything back together again and I'll have a better description on how to remove and re-install the fairing.

Naked Bike!


Headlight Upgrade Review

Tomas Perez

Tail of the Dragon ride


I'm always for more light while riding at night in country roads.  The reasons being both my aging eyes and the fact that I do a lot of country riding on Texas roads and highways.  We have lots of deer, javelins, feral hogs, and even cows and horses that can get out on the road.  This review is the beginning of the changes to my BMW R1200RT lighting system.

I used the OEM headlight bulbs on my bike until the first burned out after about 18 months.  I was at a bike rally and many miles from home so I had no option for a major upgrade but I did want something better than stock.  I found an Auto Zone store in a small town and found the Sylvania SilverStar Ultras on sale.  The RT uses two H7 bulbs for low beam and one H7 for the high beam.  It took me about an hour in a hotel parking lot to replace the first H7 with the new Ultra bulb.  The second bulb took me about two minutes to replace.  If you plan to replace the bulbs on your BMW RT take the time to find out how the bail wire hooks up in it's locked position.  That can save you a ton of time.

The Ultra seemed to be better than stock but this review is for the Osram H7 Rallye 65 watt bulb.  I got two bulbs from Candlepower for $36 and free shipping.  This bulb is rated at 2100 lumens and 500 hours.  The stock bulb is rated at 1400 lumens and the same bulb life.  I first replaced the left side bulb and wanted to compare that to the right side.  I could tell the light was brighter for the Rallye bulb when I pointed the lights at my garage door but the comparison was difficult because the light pattern of the left and right side bulbs is different.  I went ahead and replaced the right side bulb.  I also used one of the old Ultra bulbs for the high beam.  That set me up with the 65 watt rallye bulbs for the low beams and an Ultra for the high beam.

I went for a ride immediately after I finished the install.  The difference is not an obvious change in lighting.  I had to ride some country roads that had no lighting to notice what seemed like greater range.  Using the high beam did seem like an obvious improvement.  Once I turned around and headed back home and only using the low beam is when I started to notice the difference.  Side lighting was better than before and what I really noticed was that on roads I regularly traveled I was seeing and reading road signs much sooner than before.  It was also easier to read street names.  I always had a problem with this with the old lighting whenever street names were posted higher than normal.  The old light pattern seemed to miss them.

I'm happy with the upgrade.  It is an improvement but I hope the extra heat from these bulbs doesn't do any damage.  Also, I'm still considering doing the HID upgrade but for now I'll run this setup.  These bikes have great lighting and now it's even better.

tsp

'79 BMW R100RT: Third Day Progress

Ricardo Perez

New Mud Flap & Renewed Plates!

I've had the RT now for about two weeks, but yesterday, a Saturday, I had time to work on it for the third time. This time I installed a new air filter element; changed the oil and oil filter; changed out the transmission fluid; and the rear end fluid. I used Mobile 1 VTwin motor oil and Royal Purple 75W145 for the transmission and Mobile 1 75W145 for the rear end. All the plug bolts were fairly frozen on so it took some doing to get them loose and the old oil filter was the wrong one so it was tough getting it out. BMW makes a filter that is two piece so you can install and remove it without having the frame interfere like it does when using the one piece type. I don't know how they got that filter in, but I had to tear it to get it out.
We adjusted the idle speed to just over 1,000rpm so as to make sure that the oil light didn't come on as it was doing when the idle was at about 750rmp. I also used some de-greaser to clean up the rims and the disc brakes. I lightly sanded the front discs and the breaks seem to work much better.
We took the bike for a short test run and it's running smoother and shifts better. We're still getting some oil weeping from the pushrod entry point into the block and from the oil pan gasket, but those seem to be very minor and can get to them on our next work day.

1979 BMW R100RT Motorcycle Video

Ricardo Perez

Okay, here's a short video of our first day's work on the bike!


Well it's day two with the Beemer. Today we replaced the float and needle valve on the left side; replaced all the fuel lines; installed a new clutch cable; replaced saddle with one I picked up for $75; replaced some old 50 watt driving lights with my Hella DE Xenon HID Micro Lights; inflated the tires to proper levels; emptied gas tank and replaced it with new gasoline; installed my Garmin Zumo 550 brackets and cradle; installed a battery charger pig tail; and did a ten mile test run. Brick by brick it'll come together. It's already running great considering how it was running on Wednesday when I purchased it. More to come later!

Purchased Rare Find: 1979 BMW R100RT

Ricardo Perez


 That 1979 BMW R100RT that my brother Tomas, pictured above, found under a tarp in McAllen, Texas is now my new bike. Yesterday, being leap year, seemed like a great day to buy a good looking motorcycle. It was only about seven miles from my house so riding it home I never made it past fourth gear, but I could tell that this bike has a lot of life left in it. It was a great price and the doctor owner said he'd like to see it go to a good home. It came with the rare air pump and original tool kit.
The odometer is not working, but the seller said that it can't have more than 40,000 miles on it because he hardly ever rode it. Overall the bike looks good and except for a few minor dings it's in great condition. My brother and I spent the day just tinkering with it and here's what we've jumped into:
We drained the tank and will be getting some fresh gasoline tomorrow. There was water and trash in the gas so we're glad that was covered;
I pulled off an old add-on stop light that was not working;
I removed those huge driving lamps and hope to install a set of HID lights I've got in my workshop;
We washed it twice to knock off old dirt, grease, and spider webs;
My brother removed the speedometer to check it out and clean the lens from the inside. Only problem with odometer is that the gear that turns the numbers slides off the worm drive that turns it. It seems as though it should have a stop or something at the opposite end to keep it from sliding away from the worm gear, but it conical shape at the end makes it hard to add any kind of "stop". Any ideas are welcome.
Greased all grease nibs;
My brother fixed the wind shield knobs that were not working thus not allowing us to adjust its height;
Before we drained the gas we had added some "sea foam" to get the water out;
I removed the seat to check for the standard pegs so I can start looking for a replacement "stock" seat;
and we tinkered with other odds and ends.
We still need to work on the clutch since first gear take offs are somewhat abrupt unless you really give it some gas and slowly engage the clutch.
Tomorrow I'm going over to check out a friend who's got a stock seat that may fit my bike. Then there's lots of little things that need attention, but overall this is one great bike in my opinion.


Reads 37,858

Wheels are dirty, but in fine shape with new Michelins 


Bike under a tarp...

Tomas Perez

1979 R100RT
We are going to go look at this bike tomorrow.  I've seen it a car port for a couple or three decades and finally stopped by the house and asked the guy about it.  It's rather low miles for the age of the bike.  Also, that is not a RDL saddle.  It's custom made by I think a boat company.  The pan is thick fiberglass.

Besides the seat, the bike has driving lights, fork brace, mud flaps (kind of beat up), remote mounted fuses, has working amp and clock in the dash, and it has the bags that came with it.  Notice the heel and toe shifter? I thought it was aftermarket but I think these bikes came with this shifter.

We put a booster charger on the battery and started the bike!  I think the 79 was the first R100RT in USA.

Comments welcomed.  I had a 1984 R80RT but this bike is bit "different".

Looked at the bike today (2/28/2012).  It has new tires and battery.  Also comes with a weird top box.
tsp

BMW Motorrad RainLock 2: Motorcycle Rain Gear Review

Ricardo Perez

Rain & Mud
UPDATE No. 2: The RainLock 2 size I purchased is size "L" (large). I"m 5'10" and weigh 175.  I use a size 40 coat size and the rain jacket is just about perfect for me, but it can't be any smaller without restricting my arm movement and tightness on the upper back shoulders. I figure an XL would work on me as well, but it might be a bit loose. The pant's waist are about 30" with the elastic un-stretched and about 38" stretched to the max. My waist is 34" so they fit just right over my jeans. The inseam is only about 30" but the measurement from the waist to the crouch is 15". I have a 31" inseam, but these rain pants cover my entire jean without it ever riding up. I rode in a hell of a rain storm and never got wet on my way to Big Bend National Park a couple of weeks ago.

UPDATE No. 1: Rode through heavier rains on May 10, 2012 using my RainLock 2 and stayed perfectly dry. It was a real down pour as we rode to Big Bend National Park we had rain off and on for over 400 miles and at one time, near Dilley, Texas it was very heavy rain, missing some serious golf ball size hail by about five minutes. Bottom line: I stayed nice and dry, the hood sure does help by keeping water from running down the back of your neck and onto your back. This stuff works!


My one-piece BMW Rain-Suit now has about 10 years on it and it's beginning to crack in places so I decided to use my wife's (snug fit) Tour Master two piece rain gear on a recent rainy ride. I opted for the Tour Master simply because it's so much easier to maneuver into and out of compared to my one-piece rain-suit.  My BMW one-piece can get unbearably hot and even in mild temperatures you can break into a good sweat. After about a 265 mile, mostly in rain and drizzle, I discovered that my (wife's) Tour Master pant's inner lining had started to flake away especially at the knees (flex point) leaving me fairly wet from my knees to my boots.
We were at the local Boerne BMW dealer Northwest of San Antonio so I decided to try on the Motorrad RainLock 2; both pants and top. I immediately liked the idea that it's a two piece since there's plenty of times when you want to wear one, but not necessarily both at the same time. The pants are good to use in very light mist or when it's too cool not to have a protective wind layer and the top is good to wear over your jacket on dry cold days. Of course, the other obvious benefit is the ease of getting into the pants and top as compared to the one-piece suit.
Motorrad claims that this suit is breathable. I don't know how they accomplished that, but if it's true then it's a great milestone. It was too cool to be able to tell if it's really breathable on my return ride, but I did ride in temperatures from the high 50's to the mid 70's and never noticed any discomfort although that feeling of comfort may have been caused by my mind telling me that I better not complain about the rain gear after paying a hefty price. The pants were just under a $100 and the jacket was about $130.
Here's what BMW Motorrad says about this gear: " The two-piece rain suit is breathable and keeps out all wind and water. Design, material and fit are all intended for bad weather conditions - including the non-slip material in the seat area. The bright colors and large reflective panels make riders more visible, and therefore safer. All in all, this combination is ideal for taking the worst out of whatever the weather throws at you."  Materials are 100% nylon with waterproof coating; five-layer laminate construction and breathable.  The jacket has collar with adjustable hood built-in; elastic cuffs with velcro fasteners; zip fastener with waterproof storm flap at front; two waterproof front pocket zippers. The pants have a non-slip material in the seat area; heat resistant material in the inner leg area; outer opening zip-fastener at the side, running vertically upwards from the ankle; velcro adjustment mechanism at ankles. It come is sizes S to XXXL. I'm a 34 waist and over my jean I have about another two inches of waist expansion so sizes are more "european" than "american" so if your 35" waist I'd opt for the XL and so on. My rain coat fit just right over my leather jacket (with pads) and I'm a size 40 or 41 jacket size. Jacket is a little hard to put on over leather since nylon just doesn't slide over leather.
I wasn't too crazy of the orange color, preferring a bright yellow, but apparently BMW Motorrad only has one color per year and this year it's orange. It's bright enough to be seen in a heavy rain so that's what counts. There's large reflective panels and that's also a plus. We rode about 50 miles in the rain on Friday afternoon and about 30 or 40 on Saturday (mostly light drizzle) and I stayed totally dry. My flexibility was also good, I could turn my head and upper body to check for traffic without feeling strapped to my rain gear. I also used the hood to keep rain from dripping down my helmet and onto my back.  The non-slip bottom on the pants really work. My seat is plastic covered, but with these pants you never get that uneasy sliding around when its really wet. The boot openings are large enough to get the pants on without much trouble. Of course, like all nylon gear it's best to be seated when putting them. I hate to think what could happen if you're standing and lose you balance while trying to put those pants on.
My brief ride tells me that I'll be very happy with this outfit and like lots of Motorrad clothes it's very well thought out and quality made.


Breathable Material!
Elastic Straps At Mid-Section, Waist, & Hood

Front Zipper Covered by Overlapping Velcro Closing
Collar Straps Shut/Open

Lots of Waterproof Zippers

Hooded Zippers

Large Sleeve Openings
Pants 

Large Boot Openings/Heat Guards/Elastic Bottom Straps


Things That Work (for me)

Tomas Perez

Motorcycle Content

Updated: 2012/07/23

These are things that I have gotten or use with my motorcycle.  I have another posting for the same thing but featuring items that are not motorcycle related.  This is not meant as an all inclusive list.  There is no way that I can try all boots, jackets, lights, etc.  In addition, I want to keep the review as short as possible with, in some cases, a link to a detail review.

Motorcycle Gloves - With many years of riding I've had a lot of gloves but I did start out using non motorcycle gloves.  I'm a hard fit for gloves.  Normally I have to try on a lot of pairs before finding something that fits me somewhat well.  My last four sets are the best I've had.  I live in Texas - it gets real hot here therefore my main gloves are summer gloves.  I had the Tourmaster GX Air for summer and an old pair of HD winter gloves that I only use if it is very cold.  A couple of years ago I replaced the GX glove with the Held summer glove (don't recall the name but similar to the current Air).  Last week I purchased a middle weight glove and I really like them.  I am thinking I can retire the heavy, fat finger HD gloves and use the BMW Allround 2 gloves.  I rode several hours in the rain and I never got water inside of the gloves.  The Allround 2 gloves retail for $75.  The Held was about $80 but discounted at a motorcycle dealer in central Texas.  Conclusion: Held for the summer and the BMW Allround 2 for cold weather and rain.  Looking to try out the BMW AirFlow II gloves whenever the Held Air gloves give out.  They are showing some wear after about 20K miles of use.
Update - 2012/07/23 - Got the Airflow II gloves on 7/18/2012.  My first impressions after just 265 miles of use: Plus: These are the best fitting gloves I've had.  They fit great just wearing them on the hands and also while wrapped around the grips of the bike but maybe that is because the 8/8.5 gloves were a little too tight and the 9/9.5 fit just right around the palm but some of the fingers were a bit too long for my hands.  I'm hoping they don't get too loose after I break them in.  Minus: Compared to both the Held and the GX air gloves these gloves flow very little air.  Instead of an open mesh feel I would say these gloves are breathable.  Stick your hands out in the air stream and air is felt on the back of the hand and the fingers (nothing on the palm).

TM GX Air (Summer)

Held Air (Summer)

BMW Allround 2 (Mid weight)
Notice 2 straps and reflective strip

The Harley winter gloves


BMW Airflow II gloves

Power Distribution Panel - There are several on the market that you can choose.  I am using the Fuzeblock.  I liked it because I can select between switched and unswitched for each circuit that I need.  Everything I've added to the bike that requires power is control via this unit.
Link: FuzeBlocks

Power Amplification - Disclosure: I have only used one type of amp - the Amplirider.  This amp runs off the bike's 12V supply, has 3 source inputs, and a remote volume control.  The main thing that I like about this unit is that I have used it for many miles and years on my prior bike and had zero problems.  I purchased a new one for my new bike.
Link: AmpliRider Amp

Boots - I use a true motorcycle boot plus have two casual type boots that I use both on and off the bike.  My official bike boots are the Sidi Way Rain street boot.  They are light and totally waterproof.  For local riding I just got a pair of Timberland PRO non-steel toed work boots.  They fit me very well, are very comfortable and are also waterproof.  The other pair I use for local rides and casual use is a pair of Bates GX-8 waterproof boots.  The Bates is a tactical type of boot so they are made to walk and work on for hours at a time.  The Bates have a lace up system and a side zipper for easy on/off.  The Bates and Timberlands are both about $120.  Both are first class boots but may not protect your feet as well as a true motorcycle boot.  For serious riding I use the Sidi boots.  By the way, get a few pair of really good socks.  You will be surprised how big of a difference good socks can make.  The Smartwool socks are reviewed in this blog.

Ear Bud Speakers - After trying many I am happy with the S Plug ear buds.  They fit well, easy on, don't fall out, and have good sound quality.  I have the single speaker ear buds.  Cost - $140.  Not cheap but I think they are good.  I've had them for over a year and still going strong.
Link: S Plug Ear Buds

Jacket - I started with the full Tourmaster jacket with the winter liner.  This jacket was just too hot for summer riding so I got the Tourmaster Intake.  The Intake is a big system with two different liners - one for rain and the other for colder weather riding.  After using that jacket for a number of years I decided to go with the BMW Airflow 4 jacket and Tourmaster Sentinel rain jacket to make the Airflow a 3 season jacket.  The Airflow is expensive but very well made and it just hangs on you so well that you forget you are wearing it.  Not nearly the air flow of the Intake but I think that is a good thing.  I think too much air flow can dry you out faster than normal.  The Airflow seems to manage the air going into the jacket very well.  My record high with this jacket is 113 F.  Review pending.

Additional Brake Lights - Several around.  I got the P3 lights and like them. Very bright with a flash mode when the brakes are first applied.  The flashing lasts about 4 seconds.  When the LEDs are on normally the LEDs have a flicker to them.  The flicker mode can be switched off if you don't want that feature.  Details in a future review.

Pants - This past winter (2011) was my first time buying true motorcycle pants.  Only used them one time so review will have to wait. They are the Olympia summer riding pants with inside rain liner.  I have used the liners as rain pants with good results.
Update - 2012/07/23 - I got to try these pants on a two day ride this Summer and really liked them.  They are much cooler than jeans in temperatures from 88 to 98.  I want to know how they handle 105 to 115+.
By the way, don't use a leather belt for touring.  I know use a web belt that is both strong and is not damaged by water.  The time will come when you either ride in the rain without your rain gear or your rain suit will leak.  A wet leather belt is hard to deal with and it remains that way for a long time.

GPS - Zumo 660.  Expensive but fairly good and made for motorcycles and comes with the hardware to use in your car also. Review here: Zumo 550 & 660 Review

Seat - After 15,000 miles on my RT I bit the bullet and got the driver Corbin heated seat.  It's my third Corbin - I like them.  Seats are very personal.  Try as many as you can before you decide if you are thinking of buying an after market seat.  IMO it took about 4,000 to break in the seat (factory I think says 1,500).  One reason I choose the Corbin seat for the RT is that I had the Corbin with the Smuggler trunk on my ST1300 and really liked the trunk.  I may at some time add the trunk to the RT.

Headlight Upgrade - I added a little more power to the H7 headlights by using the Osram H7 Rallye 65 watt bulbs.  The Osram puts out 2100 lumens compared to 1400 of the stock bulbs (50% increase) and they have the same bulb life of 500 hours.  Review here: Headlight-Upgrade-Review
Update - 2012/07/23 - I did the HID upgrade for my upcoming long summer ride.  Much more light but not a perfect implementation IMO.  Detail review pending.

To be continued...

Garmin Zumo 550 & 660 Motorcyle GPS Units

Ricardo Perez

Here's My Zumo 550 Home Screen Ready for Instructions
www.garmin.com


Zumo 550

Getting lost on a motorcycle is part of the fun when you're out in the middle of Wyoming, but it's not so much fun when you're in the middle of beautiful downtown colonial Guanajuato, Mexico trying to find your way out of town or you're out in the middle of nowhere and your fuel gauge lights up warning you that you're on reserve. That's when a reliable GPS unit can save the day and perhaps keep you from getting into serious trouble.
I have the Garmin Zumo 550 and my brother has the Garmin 660 which he'll cover in another post.

Zumo Map View
The Garmin Zumo 550 built like a tank and as my brother says, it looks like it can roll off your bike at 70 miles an hour and still keep working.  In reality it can take just about any type of abuse short of my brother's opinion. Its waterproof, offers XM Radio, Hands Free Telephone Calling, Bluetooth with glove-friendly touchscreen with left-handed controls, and sunlight-readable UV-resistant display.  It was a birthday gift from my wife in 2008, what a gal! It has a smaller screen than the 665 models, but it's still just right for my needs and my motorcycle riding. I have the optional XM Radio with the XM antenna bud under my fairing attached to the radio housing. That option is rather expensive as I recall and it requires the XM subscription fee. So you can save a couple of hundred dollars doing without the XM by downloading your MP3 music to the Zumo unit.
The major differences between the Zumo 550 and the 600 series is that the screen is smaller than the 600 series and it does not have the street level 3D view which I can do without, but is nice to have in big city congestion.
I have used my Zumo in freezing weather, in days well over 100 degrees, and in frog-choking downpours and in total, I think it has "reset" itself or just gone "off" several times due to extreme conditions.
When I first got my Zumo I could load just about the entire North America Maps on it, but recently I've had to restrict myself to the lower 48 Southwestern United States Maps due to the limited memory on the 550. I also have the lifetime map upgrades option through the garmin website: www.garmin.com  I have the Mexico and Italy MicroSD Cards and being on the border and formerly doing much riding in Mexico I leave the Mexico Card plugged in at all times. The SD card slot and USB port are under the Zumo's bottom cover which flips open. I have my XM wired to it at all times and rarely have my bluetooth connection to my phone since I'm not too keen on taking phone calls while I'm riding.
I also have some scenic Texas routes loaded on it as well as all Harley dealerships in the nation and Best Western Hotels. There a slew of other POIs (Points of Interest) you can load on to it as well.
Zumo Options
When I need gas it's a breeze to get the nearest gas station or any other amenity including hotels, restaurants categorized by types of food, state parks, banks, museums, and just about any other POI you might want to look for. I almost exclusively rely on the speedometer reading which is much more accurate than the Harley speedometer for setting my speed. Other neat features include information such as elevation, time of day, miles to destination, distance to next turn, and of course, the map which zooms in and out to your liking for a view of what's up ahead over that next hill. It automatically switches background color at sunset and provides a nice purple night light viewing.

Zumo Options
It comes with some outstanding RAM mounting hardware which lets you mount the Zumo at just about any location you choose. I have mine on the handlebar, right hand side, but can easily operate it with either right or left hand. I have it on that side since it's easier for me to input information when the bike is off and on the side stand and also best when on a long lonely highway when the bike is on cruise control.  It has its own battery so you can keep the GPS on when you turn your bike off and, of course, the programming allows you to use your system in a variety of different modes with different voices (male, female, british, spanish, etc.) It also comes with suction cups for mounting on your vehicle window, has a built-in speaker and a neat rubber cushioned carrying case. Plus AC charger, vehicle power cable, motorcycle power cable, custom caps to change its appearance, USB cable, owner's manual on disk, security screwdriver, and Garmin stickers.
 In my opinion the Garmin is the best unit out there and if I upgrade it'll have to be another Garmin since I've been very pleased with this product. I'm waiting for a reason to upgrade to the 600 series, but my Zumo has been so reliable that it looks like I may as well wait for the 700 series which is sure to come within the next year or so. 
Ram Mounting Hardware Comes With Unit


The following was posted by tsp...
Garmin Zumo 660

I have the Zumo 660 mounted on a 2010 BMW R1200RT using Ram mounts attached to the handle bar mounts.  This is probably not the best method of mounting the GPS but it's easy and cheap.  I'm still thinking of mounting it above the gauges but for now I'm fine with this installation.

My view from the seat.
Looks better in real life than this picture shows.

The item on the left is an XM radio.  I also use the MP3 capability of the Zumo for music.


Side view of mounts


View thru windshield of Ram mounts
The type of Ram mount I used replaces one of the bolts holding the bar on the triple clamp and passes through a Ram ball.

I went with the 660 instead of the 665 mostly due to cost and the fact that I use the XM that you see in the photos in my house.  I really did not want to use a Zumo inside the house for radio function.  But if you have the money it does offer a clean solution for GPS, MP3, XM, and weather reporting.

The Zumo 660 is much better than my prior GPSs but those were more than 10 years old.  Not a fair comparison.  I also like the fact that the Zumo unit has batteries enabling you to take it with you wherever you go and plan or change travel routes. 

View with XM and GPS removed.
Perspective not correct.  Unit mounts do not block my view of anything .

tsp


How Smooth is the Honda ST1300?

Tomas Perez

When I was selling my 2003 Honda ST1300ABS with 48,000 miles I took the picture below to demonstrate how smooth the engine was even after that many miles.  I saw this performed on a used car (Lexus) so I thought I would try it on a motorcycle.  Notice that the engine is idling at about 1100 RPMs.  The coin used is a nickle and no, it is not glued to the gas cap.  :)


I miss that bike but still like my current ride.

tsp

Rev'It Functional Under Garment Liners For Motorcycle Riding

Ricardo Perez


Rev'It Jacket Fleece Inner Liner


My review of Rev'It  http://www.revitusa.com liners.
Weather is turning a bit cooler and on a ride to Austin we stopped at Lone Star BMW on Lamar Street to check out riding gear. Early Friday morning the wind chill was in the 30s so we naturally gravitated to the cold weather gear. I wanted something that would keep me comfortable, but not feel restricted in my movements. That's sometimes hard to do when you've layered so much clothes that it makes it difficult to move. I'm a warm bodied person so when it's below 72 degrees I start to layer on clothes. If it's really cold I typically wear, in order, a tee shirt, a long sleeve nike athletic shirt, a long sleeve shirt, my harley heated vest, my jacket liner, and my heavy leather jacket. That's a lot of stuff and if it's below freezing I'll put on my one-piece BMW rain gear over all of that. I end up feeling like the little brother in the movie "Christmas Story" when his mom wraps him up before he steps outside.
Although by mid-morning the chill factor was in the upper 50s, much better riding weather, so I did away with all layers except for my nike athletic long sleeve shirt and my new Rev'It liner under my leather jacket. I also wore the pant liners. I was perfectly comfortable and able to move freely without all my usual bulky layering.

Rev'It Pant Liner
Rev'It Liner
I have Harley Davidson long under pants, but I've never been totally happy with the fit. It seems that the upper section just sits a bit too low for comfort. I tried the Rev'It pant liner and it's a good fit especially under my jeans. The fit and finish of both the jacket and pant liners are top notch. The pant liner's front section is a heavier wind blocking material than the rear leg portion so it makes a very comfortable sitting position. The elastic waist band is just right, not too wide or too narrow, in my honest opinion, and the leg bottoms are nice and snug so they don't ride up on you.
Fit and finish on the jacket liner is very good. It's zipper is good quality and at the top of the zipper is hooded so that you won't be chaffing your chin on the zipper. That's a nice touch that you won't really notice until you're out on a long ride. Other nice touches include overlocking seams, moisture wicking function, elastic, and the slit pockets. The jacket liner also has a nice longer tail so you won't be getting a cold draft coming up your backside. It has two large zippered pockets which come in handy. Overall the vest is tight fitting, water-repellent, and body-warming.  The Rev'It membrane is laminated between two layers of fabric, the outer layer is a stretchable fabric and the inner layer is a soft fleece. I rode over 300 miles with both liners and they were very comfortable.
I'm 5'10" 173 lbs and a size 41 on coats and wear a 16.5 X 33 shirt (large) so I purchased both jacket and pant liner in size "large". The fit is snug and not loose as it should be, but keep in mind that this is a European company from the Netherlands so fit is more typically smaller than US cuts.
Rev'It Collar
The tag says it can be washed, but I haven't tried that yet. Overall, I am really pleased with the comfort of both liners. They performed really well and the fact that it's breathable doesn't leave you feeling clammy so on a scale of one to ten, I'd give these liners a nine. The only negative is that the pant liner comes without a fly opening so that's a small inconvenience, but I'm sure it not there by design to keep that wind chill out. Seem like Rev'It is out to make a mark with top of the line riding gear so in my opinion they're worth checking out next time you're in the market for a good light quality liner for cold riding season. I'm always on the lookout for "functional" riding gear especially living in South Texas where we can have 30 degree shifts within the same day.