Contact Us

Use the form on the right to contact us.

You can edit the text in this area, and change where the contact form on the right submits to, by entering edit mode using the modes on the bottom right. 

800 S. Francisco St.
Mission, TX
USA

Our website is all about motorcycles, especially BMW cycles. We cover rides in the Southwest and Mexico, motorcycle modifications and review motorcycle products. 

Big Bend National Pk.jpg

Tips

Filtering by Category: "R1200RT"

BMW RT Switch Gear Repair... Maybe!

Tomas Perez

Updated 2014/01/19 - 2013/06/13 - 2013/06/04

Warning: This may not work for everyone!

Update: The switch finally totally quit on me (Jan 2014)

I stumbled into something that seems to have fixed both my right hand and left hand switch gear on my 2010 BMW R1200RT.  The bike currently has about 44,000 miles.  The left hand switch has been replaced four times since the bike was new.  Failures include bad cruise control (twice), bad windshield switch, and bad horn switch.  The last time the LH switch was replaced was April 17, 2013.  During a short 220 mile ride on May 27th I noticed that the windshield switch was not working while trying to raise the windshield.  That's the same problem I had with the switch when the bike was less than a year old.  In addition, when I stopped for a water break the bike would not start.  I kept pressing the start button while I cycled the clutch, side stand, and gear shift lever.  Nothing helped but after a number of presses the bike cranked over and started.  This behavior continued for the rest of the ride.  By the time I got home it was very difficult to start the bike.

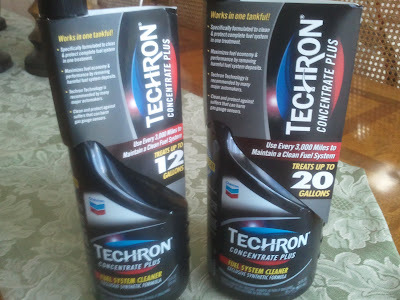
The Service Manager at the dealer told me to spray some kind of contact cleaner on the starter switch so that I could start the bike and take it to him (265 mile each way).  I decided to use WD 40 Silicone spray mostly because it said it was safe for plastic and rubber parts.  It also provides a waterproof coating on parts.  I sprayed the switch and it would work after about 3 pushes.  Looking good!  I used a very small amount on the windshield switch also but it did not help.

The following day I went for a test ride.  The starter switch worked every time on the first push.  The windshield switch would work after a few tries.  By the end of my 10 mile test ride it was working on the first press almost every time I tried.  On the following day all was still well with the starter switch and the windshield switch continues to get better.  I'm thinking it might need a little more lubricant since I used very little the first time but I will continue to evaluate.  In the mean time the dealer is looking into getting the LH switch replaced under goodwill since the switch failed after only 6 weeks.

2013/06/04 - Update:

 I've gone on a few short rides.  The starter switch is working 100% of the time.  I can move the windshield up by pressing the switch in a very special way.  I don't want to hit it with more lubes because the dealer has agreed to replace the switch again.

2013/06/11 - Update:

The Boerne dealer replaced the LH switch gear on 6/7/2013.  I left the bike at the shop on Thursday and by 8:10AM on Friday the service manager called me telling me that the bike was ready.  All is well with the LH switches now.  I did have to try the starter several times before it made contact and started my bike on Saturday (6/8/2013).  I should mention that the bike sat out in the rain and I did some riding in the rain.  Maybe water is getting into these new switches.  By new I mean the 2010+ RT switch gear.  I plan to continue to use a cleaner/water repellent type of contact spray on the RH switch.  I hit a lot of rain yesterday and the switch worked fine.  My Austin, TX dealer is going to try to get the switch replaced since the bike is only a little over a month out of warranty.  I did confirm that once I start to pay for these switches they have a 2 year replacement policy as long as they are installed by the dealer.

2013/08/25  - Update:

I just wanted to add that the starter switch is still working and I have not done anything to it since the first time.  I'm tempted to give it another shot of silicone but if it's working I'm not going to mess with it.

2013/10/19 - Update:

The starter switch finally gave out three days ago.  Early in the day it was taking anywhere from 5 to 10 presses of the switch to get it to work.  By the time I got home it was taking way more than 10 presses to start the bike.  I did the contact cleaner and silicone spray thing again but it did no good.

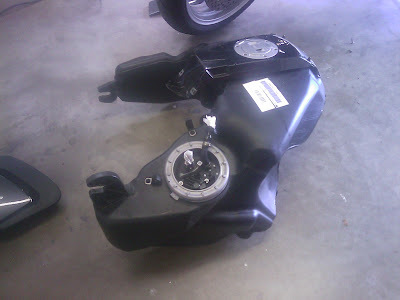
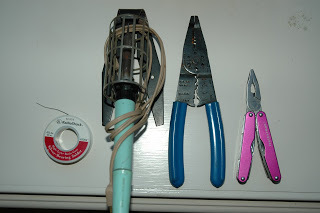
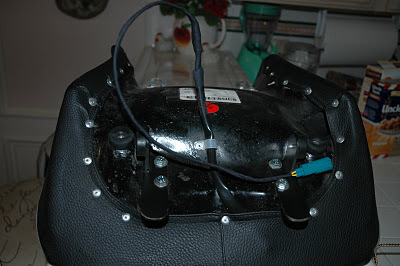
Well... since my dealer is 265 miles away I decided to experiment a little.  In any case, I had nothing to loose and I had to find a way to start the bike so that I could ride it to the dealer.  I can make it on one tank of gas if I don't ride too fast.  What I did was to remove the switch from the bar.  There are only two very small screws holding the two halves together.  I think they are Torx 7 or 8.  Once off the bar there is not much more of the switch that you can see except for the wires leading to the switch gang.  In any case, I sprayed the starter switch with a good dose of contact cleaner.  The cleaner must have done it's job too well.  The reason I say that is that once I cleaned the switch I could hardly move it to either the stop or start position.  So then I hit it with a couple of short squirts of the silicon spray.  I let it soak for a few minutes before I tested it prior to reassembly.  To my pleasant surprise the switch worked!  Today was just my second day with the repair but the switch has been working perfectly.  I'll update this post if there is any change but so far so good.

tsp

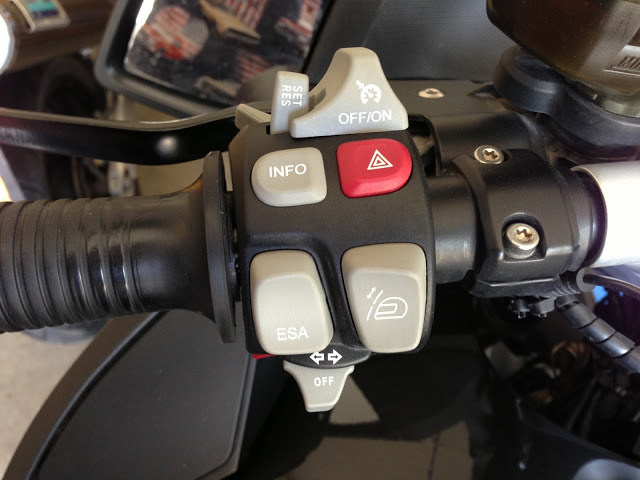
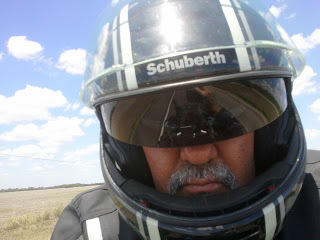
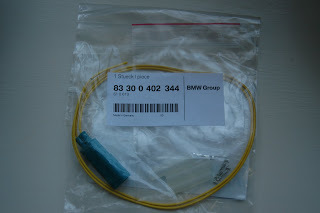
Still looks new but it failed... again!

New Bike Break In Procedure

Tomas Perez


There seems to be two schools of thought when it comes to breaking in your new motorcycle engine; 1) ride it gently like the manual instructs you to do and 2) ride it like you stole it.  The standard way is keeping the revs (RPMs) under a predetermined limit for a given number of miles.  Some break in instructions allow for an increase in the RPM limit as the miles traveled pass milestones.  The second method (ride it like you stole it) is pretty much self explanatory.  Ride the bike hard and rev it to redline in the lower gears.

Break in procedures and the associated warnings are in place for a number of reasons.  First and foremost is the fact that all those parts that rub together must hone themselves in thereby creating a very smooth surface.  This process is effectively rubbing (I'm using that term rather loosely) all the peaks and valleys that the mating surfaces have after the manufacturing process.  Even if the assembly process honed every mating surface involved that would not provide any assurance that it would mate up with another part that is probably a different material and typically the opposite shape.  An engine has many examples of this, for example, pistons, cylinders, piston rings, wrist pins, crank shafts, connecting rod bearings, main bearings, and all kinds of cam components.  All these parts are rubbing together and depend on a smooth surface and a thin film of oil to prevent them from self destructing.  Engine technology and metallurgy has changed a lot since the early days but the basic principals of smooth mating surfaces still apply.

I have heard several reasons for the manufacturer's recommended procedures including that they want to make sure that a mistake wasn't made during assembly and the gentle break in will prevent catastrophic damage to the engine.  I believe the reason, apart from basic engine break in, is so that people don't push their machines to the limit for extended periods while all the moving parts are still adjusting to themselves.  In other words use common sense for example warm the engine up before pushing it, no extended redline running, no low speed wide open throttle extended runs, etc.  Each of these has a good mechanical reason for avoiding.  In addition, BMW recommends an oil change in the first 600 miles.  The main reason is metal wear.

There was a time when new or rebuilt engines would require crosshatching the cast iron cylinders in order to help seat the new rings.  Today's engine use much better materials for cylinders, pistons, and rings.  Since this material is so much harder it makes break in a longer process.  Of course the plus side is that once everything is seated in properly you have an engine that can run for many miles with very little wear.  When was the last time you heard someone complain about their engine having piston slap?

When we used to overhaul engine many years ago (cast iron block and the new thing back then was chrome rings) we would take the cars out to the highway and accelerate up to about 75MPH and then close the throttle completely until the car slowed to about 45MPH and accelerate again.  We would do this a number of times in order to seat the rings in.  This is nearly the same process that I use with my new motorcycles.

I push hard up to high speed of about 70 or 80 mph if I can.  If I have no safe way for those speeds I still do the same hard acceleration but in lower gears to much lower speeds.  Then as soon as I reach my target speed I let up on the throttle as much as I can.  For example if there are cars behind me I can't totally drop throttle but I still slow down a lot until the cars approach me again and I repeat the process.  The reason for hard acceleration is that it places a much greater force on all the piston and crank shaft parts.  Accelerating increases piston side thrust pressure and the combustion force increases the pressure on piston rings also.  The deceleration process is just as important.  When you close the throttle at high engine speed you are creating a negative pressure in the combustion area.  This negative pressure wants to suck oil into the combustion chamber.  It wants to suck it past the piston rings and even the valve guides.  This action serves to lubricate and cool those parts.  It's the breather they get after they were pushed hard in the acceleration process.  This procedure is very different from that of holding the throttle open for an extended period of time.  Doing that is never recommended - new or old engine.  That's the reason race car engine need overhauling so frequently especially drag racers.  Also note that I don't approach redline with this procedure - at least not with the RT but I did with my ST1300.

I'm not sure if this can still happen with modern engines but a caution used to be that an engine had a short time to properly start the break in process.  If not followed properly the risk of glazing cylinder walls existed.  Once this happened further break in could not take place.  Someone had to tear the engine apart again rough up the surfaces again and new rings installed.  Worn rings would not seat as fast or as well as new rings.  The rule was don't baby the new engine.  By the way, brake shoes used to glaze over also and that would render them nearly useless for stopping the car.

I'm one of those guys that never had a bike use oil including my current 2010 R1200RT.  Recommended oil changes are 6K miles but I have gone 8K miles between oil changes twice because of extended tours of over 4,000 miles and the engine has never needed oil.  The riding conditions always include high speeds, heavy loads, and lots of climbing - all conditions that increase oil consumption.

A cool 36 F in June

This is the procedure that I use.  I am not saying anybody else should use it.  As much as we pay for these bikes we should be careful with them.  I'm simply sharing what I do and why.

tsp

Switched (and Unswitched) Power Options

Tomas Perez

Power Distribution Box


What do you have to do to provide power to an accessory that you want to add to your motorcycle.  This is what I did on my R1200RT but the same principle applies to nearly any other motorcycle.

Definitions:
Switched - This means that power is supplied whenever the key is turned on.  Power is off when you switch your bike off.  It's nice because you don't have to worry about turning stuff on and off.

Unswitched - Power is always available regardless if the bike is running or not.  The caution here is that whatever you are powering could drain your battery but there are a number of times you may want to use this method.

Let's say you want to add a heated seat to your bike...

There are two ways you can provide a switched power source to your heated seat.  The cheaper (although not as nice or versatile solution) is to power a relay via the marker light wire.  The marker light is the small light at the corners of the headlight.  FYI: the marker light is really a parking light that is required in some countries.  You might be able to use the headlight wire also but I tend to stay away from those because of the CAN bus system.  When you turn on the key the light goes on and at the same time it energizes the relay that turn power on for the seat.  Bike off and the relay drops power and the seat is no longer receiving power power.

A better solution would be to use a power distribution box.  There are several in the market but I use the FuzeBlock.
Link: FuzeBlock

One small box kills about 4 birds with one stone.  This solution allows you have switched and unswitched power available to multiple devices and in addition allows you to fuse each one separately.  I use mine to power additional brake lights, XM radio, GPS, power amplifier, and SAE power plug.  I also have a direct connected (fused) SAE to the battery for heavy duty stuff.

Once you have installed a power distribution panel to your bike it makes it easy to add powered options.  In addition, you have the option of using switched or unswitched power.  You can even have double switched power to a device.  For example, let's say you want to add a driving light that only turns on with your high beam.  These types of lights normally come with a switching relay that is controlled by the high beam wire and directly connected to your battery but  I would still use the power distribution box to supply power to the switching relay.  This is a case where you could use either switched or unswitched power to the relay since the relay is only switched (powered) whenever the high beams are turned on.

When shopping for a power panel be sure to look into the number of circuits supported, maximum current per circuit, and total current supported by the panel.  Also are the circuits switched or unswitched.  You might be able to live without unswitched circuits but at times that can be very handy, i.e., map lights, cell phone chargers, camp lighting, etc.

tsp
FuzeBlock

Fuel Additives and Other Snake Oils

Tomas Perez

Back when I was young and I was purchasing cars for $15 we would at times have to buy a thick... very thick... oil additive for old, tired engines.  It was not a fuel additive but more of an oil additive.  The additive's main function was to stop oil burning.  I guess it made the oil so thick that it had no way to work it's way up past the piston rings.  That thick stuff on the piston skirts also quieted the piston slap on my 1947 Nash.  And since it seals around the compression rings so well I was also expecting a power increase.  All these benefits in a small bottle.  It was no wonder that I wanted to buy a bottle at every oil change.  Warning - do not follow the advise listed above.  I was 15 years old and I thought I knew a lot about cars.

Put fuel additives into this oddly shaped thing


Fast forward to the present and I now have a 2010 R1200RT that cost me a bit more than the $15 that I paid for that first car.  I need to insert a disclaimer at this point.  I needed to buy a used tire and used battery plus a head gasket for the Nash before it was ready for the road.  The engine on this bike is a modern mechanical and electronic marvel.  Where the Nash had a single throat downdraft carburetor the motorcycle has electronic fuel injection.  But in spite of these advancements I've had two BMW service advisors recommend that I use a fuel additive on my RT.  They said it helps to counteract the ill effects of the not so great fuel that is currently available.  They also told me that it will help save my fuel strip.  I stated that I always buy the best fuel that I can find but that I can't always control that when I am touring.

I questioned his advise.  After all, the product that a lot of people recommend and that I have used in BMW cars in the past cost more that the used tire and battery ($6 for both) that I needed for my first car.  But I'm not cheap when it comes to taking care of my bikes and cars.  Maybe I should use a fuel additive whenever I have a chance.  And mind you, I can only use these products when I am at home and using the bike for daily errands.  There is no way I plan to carry and use these products while on tour with other riders.  Most stops are quick for the 600 to 800 miles a day crowd.  But then something happened to convince me to use these products whenever I have a chance.  In the last few months we've had some major storms in our area.  During one of these storms I think I got water in the gas tank of my Miata.  At least that is way the car acted.  It would stall at every stop light and the engine ran very rough.  Not wanting to drain the entire system I purchased a can of Sea Foam and poured it into the tank.  I had zero problems with the car after that.  I went from stalling at every stop to ZERO stalls.

I was so convinced that I immediately went out and purchased Techron Concentrate Plus for my other cars.  By coincidence the auto parts stores were running a buy one - get one free sale on Techron.  I put some in all my cars and a much smaller portion in the tank of my RT (you don't have to remove the tank to add the fuel additive - see picture above).  This stuff is sold in 12 oz (treats up to 12 gallons) and 20 oz (treats up to 20 gallons) sizes.  In addition, make sure you buy the "concentrate plus".

This is what I'm using.

While taking the photos for this review I happen to notice this statement on the cardboard tag.  Was this written for us RT riders?  Of course I'm kidding but there must be some cars out there with failing fuel sensors.

RT friendly?

I like to rate products that I review but I have no proof that this product works.  I'm sure it can't hurt car or bike engines.  As a matter of fact some gasoline has this stuff in it already.  With that condition in mind the only negative is the cost plus the time in buying it and using it.  My cost was $7.99 and $12.99 for the 12 oz and 20 oz respectively and I got two for the price of one.  And although I can't rate this product my Miata will give the Sea Foam a 10.  I've already gone through two tanks of gas and still no problems.  I used the Sea Foam for removing water from the tank and prefer the Techron for keeping the system clean.

tsp


What I Carry on Motorcycle Trips

Tomas Perez

Updated: 2012/11/17

I know there are hundreds of postings on what to carry on motorcycle rides and this posting is just one more opinion. My concept is to keep it simple (and light) but carry what you must. My joke to friends is "if you got your cell phone and a credit card that is all you need"... but of course I add a few items to that list.

My list:
1 - Windshield cleaner, micro cloths and regular shop rag (in fairing pocket).
2 - Multi tool.
3 - Flash light.
4 - Torx tools.
5 - Plug kit and air compressor.
6 - A couple of straps in case I have to strap something on the bike.
7 - Zip ties.
8 - Pocket knife and a micro multi tool.

I need to add a couple of notes at this time. I'm older now... maybe wiser... when I was very young my list included bungee cords and chain lube... and none of the items listed above. Point #2 - I recently added the items in #5 above. I purchased a new bike less than two years ago and got a flat at 612 miles. I had not even gotten home yet. It happened on the way home from the dealer. I had two more flats before the 3,000 mile mark. Just bad luck. I now have 23,000 miles on the bike without any more flats (I know I shouldn't have said that... knocking on wood...).

These items are in addition to my normal riding gear including rain gear. I got light and heavy rain gear. That also includes rain covers for the seat and tankbag.

I'm not recommending any particular product but I'll include photos of some of the items that I use.


This is the tire plug kit and compressor that I carry. I used it to plug the last flat that I got and rode the bike for a few hundred miles without any problems. The plug kit is in the tail section of my bike (R1200RT). Compressor is in a saddle bag.  Update: I now carry the compressor in the tail section also.  I now have both items with me at all times.  I moved things around and still have plenty of room left over in the tail section.


I like these Torx wrenches (Star Pro). At home I have the 3/8 inch drive types but I almost always use these to work on the bike. They are handy and pack small. I carry them in the existing tool pouch under the seat. Note: I'm currently riding a BMW motorcycle that uses mostly Torx fasteners. I did not have this tool set on my Honda.


I used to carry the Leatherman 300 but found it a bit heavy for carrying in a tank bag. I found the flashlight and Leatherman Fuse on sale at Academy for I think $25.88 for both items. The flashlight is very good. It's the Leatherman Monarch 400. It shoots a beam of light a long ways thus not the best type for road side repairs where a flood type is best but great for campground or search type use.  These I now carry in the fairing pocket.

Update 07/23/2012 - I am adding another flashlight to my touring package.  I purchased a FourSevens Quark Pro QP2L-X flashlight.  The Leatherman 400 is rated at 45 Lumens for 1 hour on one AA battery.  The Quark runs on 2 CR123A batteries and has 8 operating modes - moonlight, low, medium, high, max, strobe, SOS, and beacon.  Moonlight is 0.3 lumens and runs for 25 days!  The other settings for regular light functions are 3.0 (5 days), 65 (11 hours), 160 (4 hours), and 360 (1.7 hours).  This is a much better flashlight for long term use (for example camping).  FYI: There is also a MiniX that is about half the size and uses only 1 CR123A battery.
I also ordered a Preon 1 from the same company to use as an EDC.  That unit uses a single AAA battery.

FourSevens Quark Flashlight


Leatherman and SOG Aegis

I always carry these on the road and whenever I'm in casual wear. I have a few knives that I use but the SOG Aegis (about $70) is one of my favorites. I now carry the Leatherman Micra (about $20) also because I have used it so much recently. Not just for bike stuff but everyday stuff. Matter of fact someone borrowed it a few days ago to install batteries in their kid's Christmas toys. My tool box was out in the garage but the Micra did the job.
Update 2012/11/17 - Why the SOG Aegis?  It's large enough to get most cutting jobs done yet not so large not to fit in any size pocket.  The blade opens very easily and only one hand is require to open the blade.  By the way, you can also lock the blade in the closed position if you want.  It's very light for the size of the knife.  I think it is 3.1 oz.  The lock blade mechanism is very solid.  The clip is located very high so that when you have the knife in your pocket very little of it shows.  BTW, this is a tip up only carry.  That is not a problem with me - I prefer tip up carry.  The clip can be switched to the other side so that it becomes a left hand carry.

I probably forgot an item or two but these are the main items I carry. Like I said, the older I get the more items I carry. And I still want to add a few items like siphon tube, jumper cables, more tools, trail mix, etc. At any rate, this is my list - some carry more, others carry less. This past summer I met a guy riding from South America to the USA, then Canada, and finally Alaska. Not sure of all that he had on board but we did learn that he had two helmets and a final drive for his GS.

I'm still considering two items that I've never carried before - a small siphon hose and jumper cables (motorcycle type of course).  I would go with the siphon hose before the cables.  One of the guys that I often ride with carries jumper cables which he once used to help start another bike.  Both of these items sure are handy when you need them.

tsp

How to Wire a Corbin Seat to a BMW R1200RT

Tomas Perez

This is more of a How To than a product review but I want to limit the number of categories in this blog. I wish the program would allow us to have sections or categories so that it would be easier to navigate.

Anyway, back on task. I purchased a BMW R1200RT to replace my 2003 ST1300ABS as soon as the 2010's hit the dealers. My last two bikes had Corbin seats (rider only) but since I paid $350 for heated seats on the RT I told myself that I would grow to love (or at least like) the stock seat on the RT. By the way, I got a normal RT i.e., not lowered and the "normal" seat. Well.... after about 15,000 miles I got a chance to purchase an almost new heated Corbin rider saddle. The stock seat would burn my butt on long tours and never was as good as the Corbin on my Hondas so I took the plunge.

I wanted a clean install without cutting any wires on the RT. Of course that meant that I had to cut the plugs supplied with the Corbin seat. Not a problem for me.

Short answer is that you need to purchased a BMW repair plug. There is a difference between the seat plug or any other plug on the bike and a repair plug. The replacement cable is the entire cable - end to end. The repair plug is only one end of any cable on the bike.

This is what you need for the heated seat connection:


I want to thank Rose from Max BMW for helping me in my search for this plug. The cost was $16.12 plus shipping.

Now for the long answer... for those new to making changes to their expensive motorcycles...

The Corbin came with these very unBMW pin connectors...


As you can see I cut them off the seat. If you don't want to cut the Corbin connectors you can buy these connectors at any auto parts store and connect them on the wires of the repair plug to connect to the seat but why do that? You simply end up have a wire with two different plugs on it. The repair kit came with 3 crimp type pins and 3 of what I think are clear heat shrink tubing (see photo above). I'm saying I think it's heat shrink tubing because I had to apply much direct heat from the soldering iron to get them to shrink.

And... not needed but I did it anyway (OCD impulse?). I soldered the crimp pins before I put the heat shrinking tubing on them. Warning: Be sure you slide these little tubes on the wires before you connect them to the seat.

You just need some very basic tools. This is what I used.


Like I said, you don't really have to solder the connections but you can't beat it for a good, reliable electrical contact.


This is a picture of the repair plug connected to the bike and wired to the seat. Sorry for the quality of the picture - it's from my phone camera. I put about two loops of electrical tape on the shrinkable tubing just to keep them together. I'm going to wrap the yellow wires with that black sticky cloth tape just to keep them tidy. You can also use a spiral wire sleeve that is small or buy a small sleeve and slide it on the yellow wires before making your connections.


Works great and it's a clean install. If you want - you can unplug the Corbin and connect the stock seat and then go back again whenever you want. If you sell the seat the new owner can only be happy that he or she simply plugs the seat in and away they ride.

If you have any questions - email me or post a comment. I'll follow up with a review of the Corbin saddle compared to stock after a winter ride.


I finally applied the cloth tape to the yellow wires. The above photo shows the final product.

Thanks for reading...